Lesson:
The Java Tutorials have been written for JDK 8.Java教程是为JDK 8编写的。Examples and practices described in this page don't take advantage of improvements introduced in later releases and might use technology no longer available.本页中描述的示例和实践没有利用后续版本中引入的改进,并且可能使用不再可用的技术。See Java Language Changes for a summary of updated language features in Java SE 9 and subsequent releases.有关Java SE 9及其后续版本中更新的语言特性的摘要,请参阅Java语言更改。
See JDK Release Notes for information about new features, enhancements, and removed or deprecated options for all JDK releases.有关所有JDK版本的新功能、增强功能以及已删除或不推荐的选项的信息,请参阅JDK发行说明。
Creating the CelsiusConverter GUI创建CelsiusConverter GUI
This section explains how to use the NetBeans IDE to create the application's GUI. 本节介绍如何使用NetBeans IDE创建应用程序的GUI。As you drag each component from the Palette to the Design Area, the IDE auto-generates the appropriate source code.当您将每个组件从调色板拖动到设计区域时,IDE将自动生成相应的源代码。
Step 1: Set the Title步骤1:设置标题
First, set the title of the application's 首先,通过在检查器中单击JFrame to "Celsius Converter", by single-clicking the JFrame in the Inspector:JFrame,将应用程序的JFrame标题设置为“Celsius Converter”:
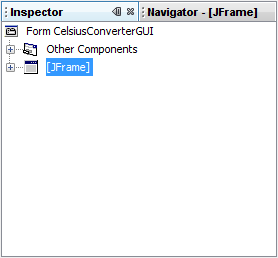
Selecting the JFrame选择JFrame
Then, set its title with the Property Editor:然后,使用属性编辑器设置其标题:
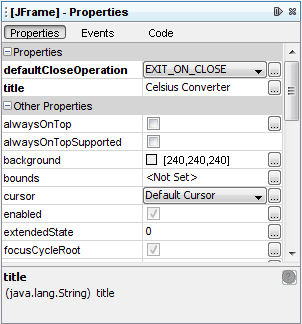
Setting the Title设置标题
You can set the title by either double-clicking the title property and entering the new text directly, or by clicking the 您可以通过双击标题属性并直接输入新文本,或者通过单击 button and entering the title in the provided field. 按钮并在提供的字段中输入标题来设置标题。
Or, as a shortcut, you could single-click the 或者,作为快捷方式,您可以单击检查器的JFrame of the inspector and enter its new text directly without using the property editor. JFrame并直接输入其新文本,而无需使用属性编辑器。
Step 2: Add a JTextField步骤2:添加JTextField
Next, drag a 接下来,将JTextField from the Palette to the upper left corner of the Design Area. JTextField从调色板拖动到设计区域的左上角。As you approach the upper left corner, the GUI builder provides visual cues (dashed lines) that suggest the appropriate spacing. 当您接近左上角时,GUI生成器将提供建议适当间距的视觉提示(虚线)。Using these cues as a guide, drop a 使用这些提示作为指导,将JTextField into the upper left hand corner of the window as shown below:JTextField放到窗口的左上角,如下所示:
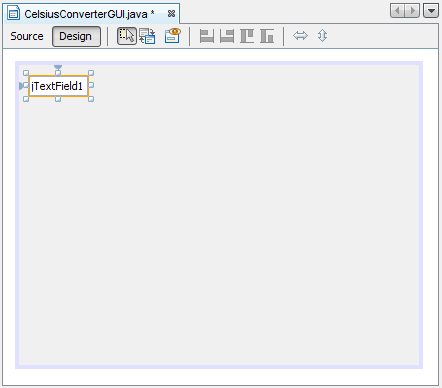
Adding a JTextField添加JTextField
You may be tempted to erase the default text "JTextField1", but just leave it in place for now. 您可能会试图删除默认文本“JTextField1”,但现在就把它留在原处。We will replace it later in this lesson as we make the final adjustments to each component. 我们将在本课稍后对每个组件进行最终调整时替换它。For more information about this component, see How to Use Text Fields. 有关此组件的详细信息,请参阅如何使用文本字段。
Step 3: Add a JLabel步骤3:添加JLabel
Next, drag a 接下来,将JLabel onto the Design Area. JLabel拖动到设计区域。Place it to the right of the 将其放置在JTextField, again watching for visual cues that suggest an appropriate amount of spacing. JTextField的右侧,再次观察暗示适当间距的视觉提示。Make sure that text base for this component is aligned with that of the 确保此组件的文本库与JTextField. JTextField的文本库对齐。The visual cues provided by the IDE should make this easy to determine.IDE提供的视觉提示应使其易于确定。
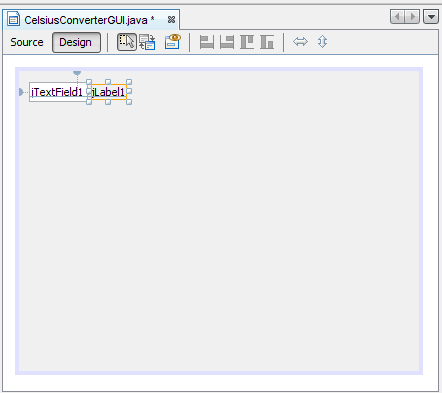
Adding a JLabel添加JLabel
For more information about this component, see How to Use Labels. 有关此组件的详细信息,请参阅如何使用标签。
Step 4: Add a JButton步骤4:添加JButton
Next, drag a 接下来,从调色板中拖动JButton from the Palette and position it to the left and underneath the JTextField. JButton,并将其放置在JTextField的左侧和下方。Again, the visual cues help guide it into place.同样,视觉提示有助于将其引导到位。

Adding a JButton添加JButton
You may be tempted to manually adjust the width of the 您可能想手动调整JButton and JTextField, but just leave them as they are for now. JButton和JTextField的宽度,但现在就让它们保持原样。You will learn how to correctly adjust these components later in this lesson. 在本课程的后面部分,您将学习如何正确调整这些组件。For more information about this component, see How to Use Buttons. 有关此组件的详细信息,请参阅如何使用按钮。
Step 5: Add a Second JLabel步骤5:添加第二个JLabel
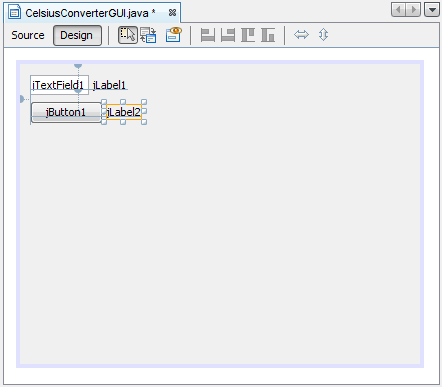
Adding a Second JLabel添加第二个JLabel
Finally, add a second 最后,添加第二个JLabel, repeating the process in step 2. JLabel,重复步骤2中的过程。Place this second label to the right of the 将第二个标签放在JButton, as shown above.JButton的右侧,如上图所示。