Lesson:
The Java Tutorials have been written for JDK 8.Java教程是为JDK 8编写的。Examples and practices described in this page don't take advantage of improvements introduced in later releases and might use technology no longer available.本页中描述的示例和实践没有利用后续版本中引入的改进,并且可能使用不再可用的技术。See Java Language Changes for a summary of updated language features in Java SE 9 and subsequent releases.有关Java SE 9及其后续版本中更新的语言特性的摘要,请参阅Java语言更改。
See JDK Release Notes for information about new features, enhancements, and removed or deprecated options for all JDK releases.有关所有JDK版本的新功能、增强功能以及已删除或不推荐的选项的信息,请参阅JDK发行说明。
Adjusting the CelsiusConverter GUI调整CelsiusConverter GUI
With the GUI components now in place, it is time to make the final adjustments. GUI组件已经就位,现在是进行最终调整的时候了。There are a few different ways to do this; the order suggested here is just one possible approach. 有几种不同的方法可以做到这一点;这里建议的顺序只是一种可能的方法。
Step 1: Set the Component Text步骤1:设置组件文本
First, double-click the 首先,双击JTextField and JButton to change the default text that was inserted by the IDE. JTextField和JButton以更改IDE插入的默认文本。When you erase the text from the 当您从JTextField, it will shrink in size as shown below. JTextField中删除文本时,它的大小将缩小,如下所示。Change the text of the 将JButton from "JButton1" to "Convert." JButton的文本从“JButton1”更改为“Convert”。Also change the top 同时,将顶部JLabel text to "Celsius" and the bottom to "Fahrenheit."JLabel文本更改为“摄氏度”,底部更改为“华氏度”
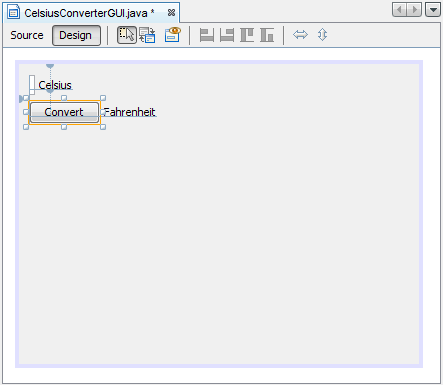
Setting the Component Text设置组件文本
Step 2: Set the Component Size步骤2:设置组件大小
Next, shift-click the 接下来,按住shift键单击JTextField and JButton components. JTextField和JButton组件。This will highlight each showing that they are selected. 这将突出显示每个,表明它们已被选中。Right-click (control-click for mac users) Same Size -> Same Width. 右键单击(mac用户控制单击)相同大小->相同宽度。The components will now be the same width, as shown below. 组件现在将具有相同的宽度,如下所示。When you perform this step, make sure that 执行此步骤时,请确保未选中JFrame itself is not also selected. JFrame本身。If it is, the Same Size menu will not be active.如果是,则相同大小的菜单将不会处于活动状态。
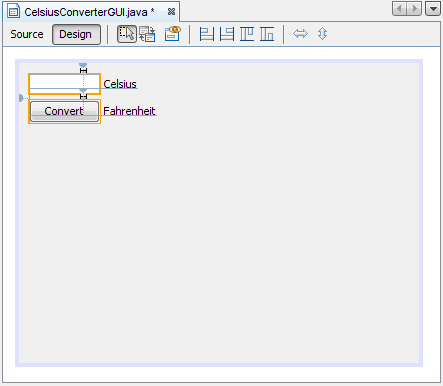
Setting the JTextField and JButton Sizes设置JTextField和JButton大小
Step 3: Remove Extra Space步骤3:删除额外空间
Finally, grab the lower right-hand corner of the 最后,抓住JFrame and adjust its size to eliminate any extra whitespace. JFrame的右下角,调整其大小以消除任何额外的空白。Note that if you eliminate all of the extra space (as shown below) the title (which only appears at runtime) may not show completely. 请注意,如果删除所有额外空间(如下所示),则标题(仅在运行时显示)可能不会完全显示。The end-user is free to resize the application as desired, but you may want to leave some extra space on the right side to make sure that everything fits correctly. 最终用户可以根据需要自由调整应用程序的大小,但您可能需要在右侧留出一些额外的空间,以确保所有内容都适合。Experiment, and use the screenshot of the finished GUI as a guide.实验,并使用完成的GUI的屏幕截图作为指导。
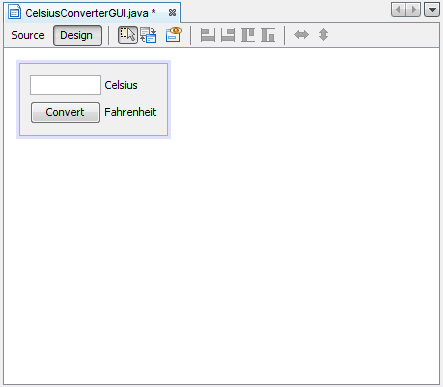
The Completed GUI完成的GUI
The GUI portion of this application is now complete! If the NetBeans IDE has done its job, you should feel that creating this GUI was a simple, if not trivial, task. 此应用程序的GUI部分现已完成!如果NetBeans IDE已经完成了它的工作,那么您应该觉得创建这个GUI是一项简单的任务,如果不是琐碎的话。But take a minute to click on the source tab; you might be surprised at the amount of code that has been generated.但要花一分钟点击source选项卡;您可能会对生成的代码量感到惊讶。
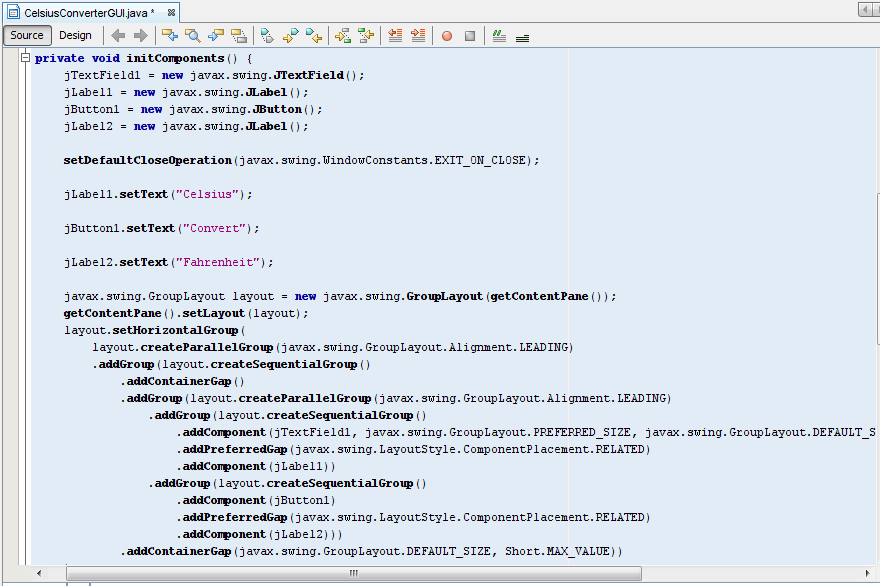
To see the code in its entirety, scroll up and down within the IDE as necessary. 要查看整个代码,请根据需要在IDE中上下滚动。You can expand or collapse certain blocks of code (such as method bodies) by clicking the + or - symbol on the left-hand side of the source editor.通过单击源代码编辑器左侧的+或-符号,可以展开或折叠某些代码块(如方法体)。