Lesson:
The Java Tutorials have been written for JDK 8.Java教程是为JDK 8编写的。Examples and practices described in this page don't take advantage of improvements introduced in later releases and might use technology no longer available.本页中描述的示例和实践没有利用后续版本中引入的改进,并且可能使用不再可用的技术。See Java Language Changes for a summary of updated language features in Java SE 9 and subsequent releases.有关Java SE 9及其后续版本中更新的语言特性的摘要,请参阅Java语言更改。
See JDK Release Notes for information about new features, enhancements, and removed or deprecated options for all JDK releases.有关所有JDK版本的新功能、增强功能以及已删除或不推荐的选项的信息,请参阅JDK发行说明。
Setting up the CelsiusConverter Project建立CelsiusConverter项目
If you have worked with the NetBeans IDE in the past, much of this section will look familiar, since the initial steps are similar for most projects. 如果您以前使用过NetBeans IDE,本节的大部分内容看起来会很熟悉,因为大多数项目的初始步骤都是类似的。Still, the following steps describe settings that are specific to this application, so take care to follow them closely. 尽管如此,下面的步骤描述了特定于此应用程序的设置,因此请密切注意。
Step 1: Create a New Project步骤1:创建新项目
To create a new project, launch the NetBeans IDE and choose New Project from the File menu:要创建新项目,请启动NetBeans IDE并从“文件”菜单中选择“新建项目”:

Creating a New Project创建新项目
Keyboard shortcuts for each command appear on the far right of each menu item. 每个命令的键盘快捷键显示在每个菜单项的最右侧。The look and feel of the NetBeans IDE may vary across platforms, but the functionality will remain the same. NetBeans IDE的外观和感觉可能因平台而异,但功能将保持不变。
Step 2: Choose General -> Java Application步骤2:选择常规->Java应用程序
Next, select General from the Categories column, and Java Application from the Projects column:接下来,从类别列中选择常规,从项目列中选择Java应用程序:
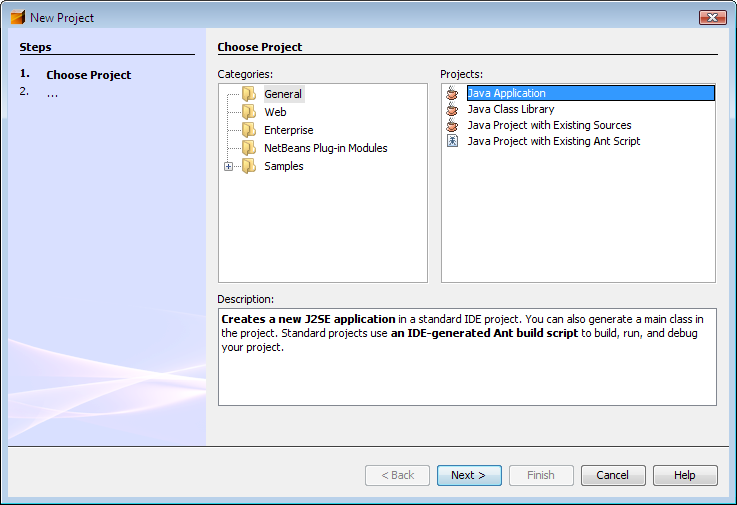
You may notice mention of "J2SE" in the description pane; that is the old name for what is now known as the "Java SE" platform. 您可能会注意到在描述窗格中提到“J2SE”;这是现在称为“JavaSE”平台的旧名称。Press the button labeled "Next" to proceed.按下标有“下一步”的按钮继续。
Step 3: Set a Project Name步骤3:设置项目名称
Now enter "CelsiusConverterProject" as the project name. 现在输入“CelsiusConverterProject”作为项目名称。You can leave the Project Location and Project Folder fields set to their default values, or click the Browse button to choose an alternate location on your system.您可以将“项目位置”和“项目文件夹”字段设置为其默认值,或者单击“浏览”按钮在系统上选择其他位置。
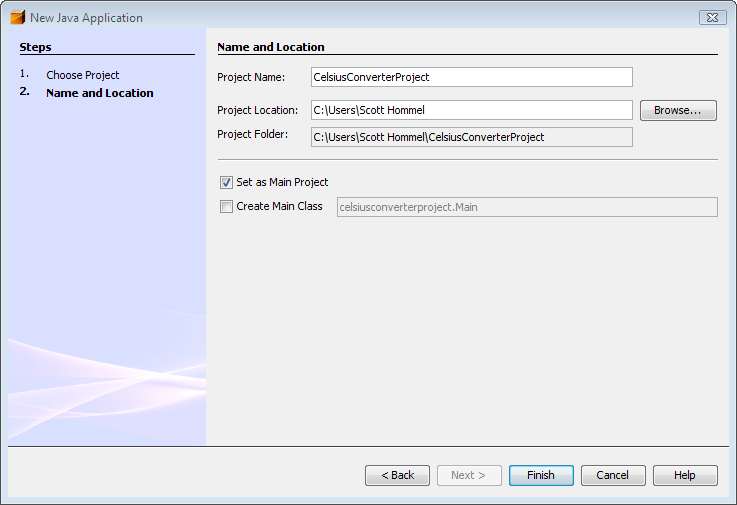
Make sure to deselect the "Create Main Class" check box; leaving this option selected generates a new class as the main entry point for the application, but our main GUI window (created in the next step) will serve that purpose, so checking this box is not necessary. 确保取消选中“创建主类”复选框;选择此选项将生成一个新类作为应用程序的主入口点,但主GUI窗口(在下一步中创建)将用于此目的,因此无需选中此框。Click the "Finish" button when you are done.完成后,单击“完成”按钮。
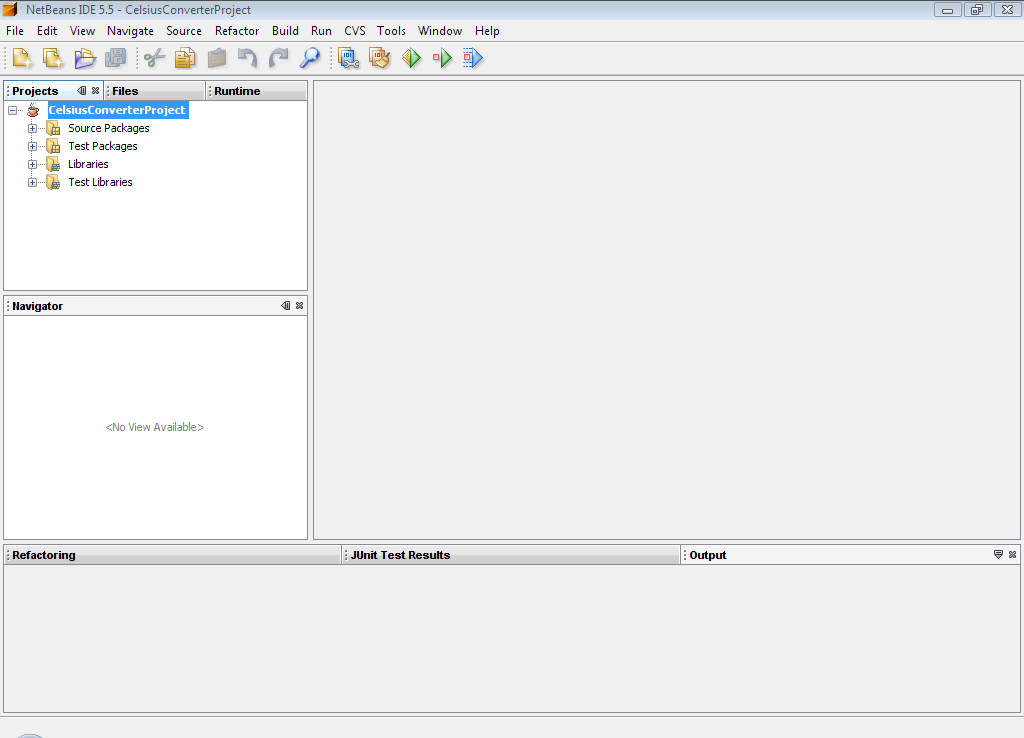
When the IDE finishes loading, you will see a screen similar to the above. 当IDE完成加载时,您将看到与上面类似的屏幕。All panes will be empty except for the Projects pane in the upper left hand corner, which shows the newly created project.除左上角的“项目”窗格(显示新创建的项目)外,所有窗格都将为空。
Step 4: Add a JFrame Form步骤4:添加JFrame表单

Now right-click the CelsiusConverterProject name and choose New -> JFrame Form (现在,右键单击CelsiusConverter项目名称并选择New->JFrame表单(JFrame is the Swing class responsible for the main frame for your application.) JFrame是负责应用程序主框架的Swing类)You will learn how to designate this class as the application's entry point later in this lesson.在本课程后面的部分,您将学习如何将此类指定为应用程序的入口点。
Step 5: Name the GUI Class步骤5:命名GUI类
Next, type 接下来,键入CelsiusConverterGUI as the class name, and learn as the package name. CelsiusConverterGUI作为类名,并将learn作为包名。You can actually name this package anything you want, but here we are following the tutorial convention of naming the package after the lesson in which is resides.实际上,您可以将这个包命名为任何您想要的名称,但在这里,我们遵循教程约定,以它所在的课程命名包。
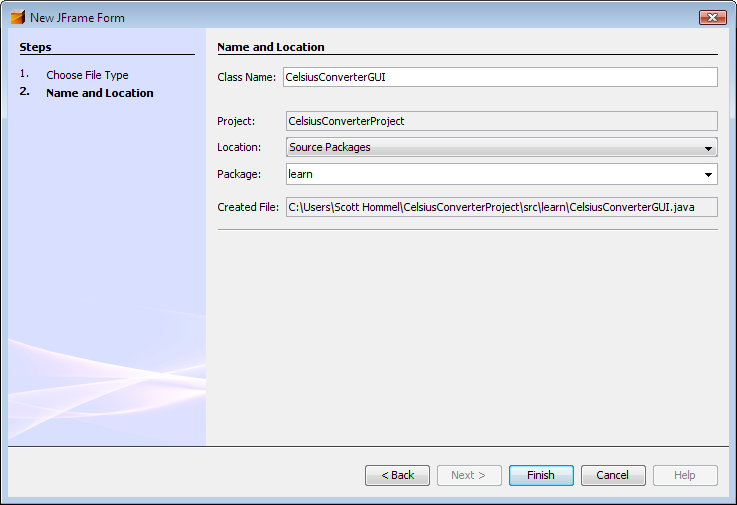
The remainder of the fields should automatically be filled in, as shown above. 其余字段应自动填写,如上所示。Click the Finish button when you are done.完成后,单击“完成”按钮。
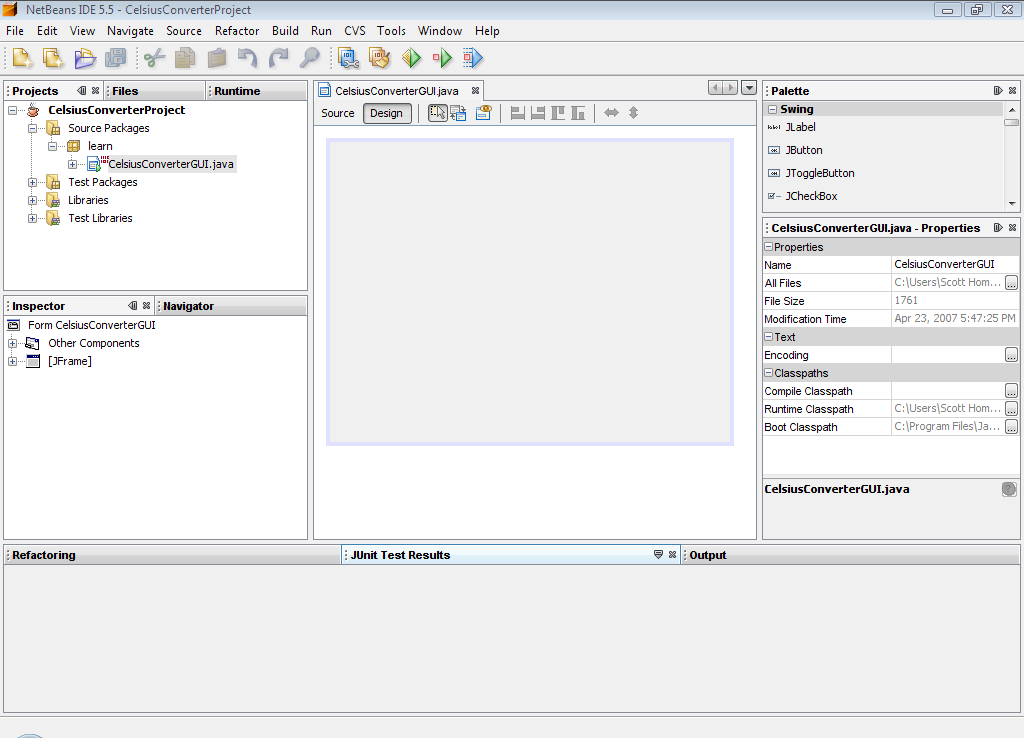
When the IDE finishes loading, the right pane will display a design-time, graphical view of the IDE完成加载后,右侧窗格将显示CelsiusConverterGUI. CelsiusConverterGUI的设计时图形视图。It is on this screen that you will visually drag, drop, and manipulate the various Swing components.在这个屏幕上,您可以直观地拖放和操作各种Swing组件。