Lesson:
The Java Tutorials have been written for JDK 8.Java教程是为JDK 8编写的。Examples and practices described in this page don't take advantage of improvements introduced in later releases and might use technology no longer available.本页中描述的示例和实践没有利用后续版本中引入的改进,并且可能使用不再可用的技术。See Java Language Changes for a summary of updated language features in Java SE 9 and subsequent releases.有关Java SE 9及其后续版本中更新的语言特性的摘要,请参阅Java语言更改。
See JDK Release Notes for information about new features, enhancements, and removed or deprecated options for all JDK releases.有关所有JDK版本的新功能、增强功能以及已删除或不推荐的选项的信息,请参阅JDK发行说明。
NetBeans IDE BasicsNetBeans IDE基础知识
It is not necessary to learn every feature of the NetBeans IDE before exploring its GUI creation capabilities. 在探索NetBeans IDE的GUI创建功能之前,没有必要了解它的每个特性。In fact, the only features that you really need to understand are the Palette, the Design Area, the Property Editor, and the Inspector. 事实上,您真正需要了解的功能只有选项板、设计区域、特性编辑器和检查器。We will discuss these features below. 我们将在下面讨论这些特性。
The Palette选项板
The Palette contains all of the components offered by the Swing API. 调色板包含Swing API提供的所有组件。You can probably already guess what many of these components are for, even if this is your first time using them (您可能已经猜到了这些组件的用途,即使这是您第一次使用它们(JLabel is a text label, JList is a drop-down list, etc.)JLabel是一个文本标签,JList是一个下拉列表,等等)

From this list, our application will use only 从这个列表中,应用程序将只使用JLabel (a basic text label), JTextField (for the user to enter the temperature), and JButton (to convert the temperature from Celsius to Fahrenheit.)JLabel(一个基本文本标签)、JTextField(用于用户输入温度)和JButton(用于将温度从摄氏度转换为华氏度)
The Design Area设计区域
The Design Area is where you will visually construct your GUI. 设计区域是您可视化构建GUI的地方。It has two views: source view, and design view. 它有两个视图:源视图和设计视图。Design view is the default, as shown below. 设计视图是默认视图,如下所示。You can toggle between views at any time by clicking their respective tabs.您可以通过单击视图各自的选项卡随时在视图之间切换。

The figure above shows a single 上图显示了一个JFrame object, as represented by the large shaded rectangle with blue border. JFrame对象,由蓝色边框的大阴影矩形表示。Commonly expected behavior (such as quitting when the user clicks the "close" button) is auto-generated by the IDE and appears in the source view between uneditable blue sections of code known as guarded blocks.通常预期的行为(如用户单击“关闭”按钮时退出)由IDE自动生成,并出现在源代码视图中不可编辑的蓝色代码段之间,称为保护块。
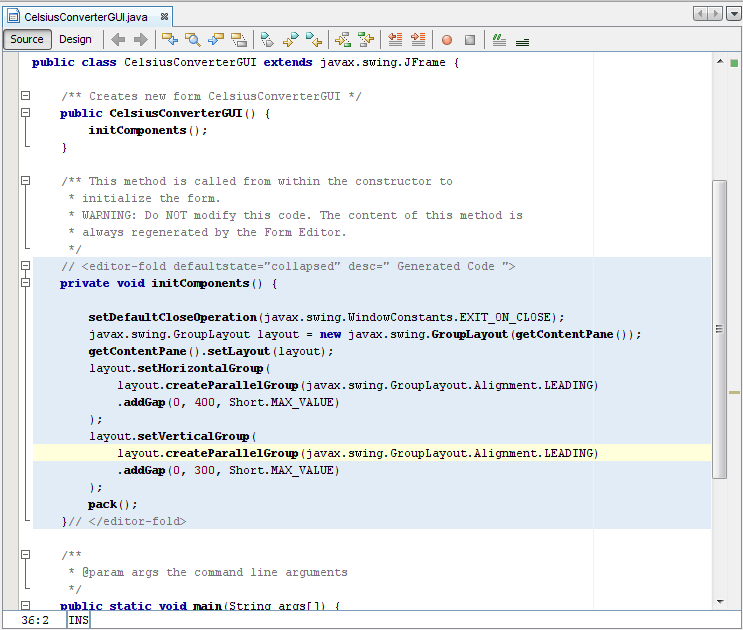
A quick look at the source view reveals that the IDE has created a private method named 快速查看源代码视图可以发现IDE创建了一个名为initComponents, which initializes the various components of the GUI. initComponents的私有方法,该方法初始化GUI的各个组件。It also tells the application to "exit on close", performs some layout-specific tasks, then packs the (soon to be added) components together on screen.它还告诉应用程序“关闭时退出”,执行一些特定于布局的任务,然后将(即将添加的)组件打包在屏幕上。
Don't feel that you need to understand this code in any detail; we mention it here simply to explore the source tab. 不要觉得你需要了解这个代码的任何细节;我们在这里提到它只是为了探索“源”选项卡。For more information about these components, see:有关这些组件的更多信息,请参阅:
How to Make Frames (Main Windows) and Laying Out Components Within a Container. 如何制作框架(主窗口)和在容器中布局组件。
The Property Editor属性编辑器
The Property Editor does what its name implies: it allows you to edit the properties of each component. 属性编辑器的作用与它的名称相同:它允许您编辑每个组件的属性。The Property Editor is intuitive to use; in it you will see a series of rows — one row per property — that you can click and edit without entering the source code directly. 属性编辑器使用直观;在其中,您将看到一系列行—每个属性一行—您可以单击并编辑,而无需直接输入源代码。The following figure shows the Property Editor for the newly added 下图显示了新添加的JFrame object:JFrame对象的属性编辑器:
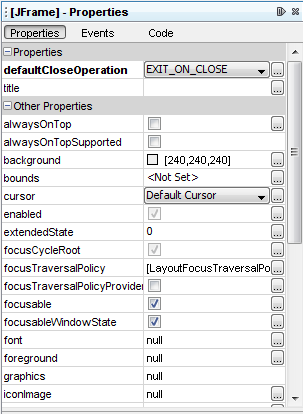
The screenshot above shows the various properties of this object, such as background color, foreground color, font, and cursor. 上面的屏幕截图显示了该对象的各种属性,如背景色、前景色、字体和光标。
The Inspector检查器
The last component of the NetBeans IDE that we will use in this lesson is the Inspector:本课中我们将使用的NetBeans IDE的最后一个组件是检查器:
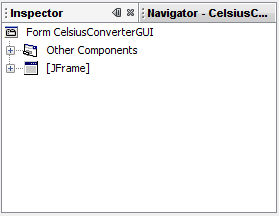
The Inspector检查器
The Inspector provides a graphical representation of your application's components. 检查器提供应用程序组件的图形表示。We will use the Inspector only once, to change a few variable names to something other than their defaults.我们将只使用检查器一次,将一些变量名更改为非默认值。