Data Munging in NeutralinoJS
NeutralinoJS is a modern desktop app framework. NeutralinoJS apps pair platform-native browser tools with a static web server.
SheetJS is a JavaScript library for reading and writing data from spreadsheets.
This demo uses NeutralinoJS and SheetJS to pull data from a spreadsheet and display the data in the app. We'll explore how to load SheetJS in a NeutralinoJS app and use native features to read and write files.
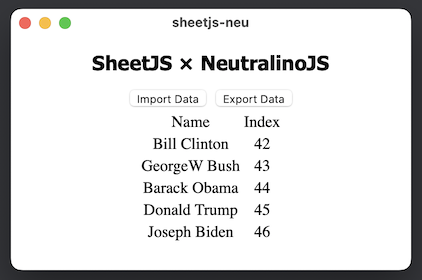
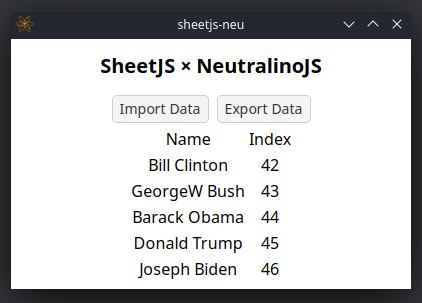
The "Complete Example" section covers a complete desktop app to read and write workbooks. The app will look like the screenshots below:
| Windows | macOS | Linux |
|---|---|---|
|
|
|

Integration Details
The SheetJS Standalone scripts
can be added to the index.html entry point.
For code running in the window, native methods must be explicitly enabled in the
NeutralinoJS neutralino.conf.json settings file1.
os.*enables the open and save dialog methods.filesystem.*enables reading and writing file data.
The starter app enables os.* so typically one line must be added:
  "nativeAllowList": [
    "app.*",
    "os.*",
    "filesystem.*",
    "debug.log"
  ],
Reading Files
There are three steps to reading files:
1) Show an open file dialog with Neutralino.os.showOpenDialog2. This method
resolves to the selected path.
2) Read raw data from the file with Neutralino.filesystem.readBinaryFile3.
This method resolves to a standard ArrayBuffer.
3) Parse the data with the SheetJS read method4. This method returns a
SheetJS workbook object.
The following code example defines a single function openFile that performs
all three steps and returns a SheetJS workbook object:
const filters = [
  {name: "Excel Binary Workbook", extensions: ["xls", "xlsb"]},
  {name: "Excel Workbook", extensions: ["xls", "xlsx"]},
]

async function openFile() {
  /* show open file dialog */
  const [filename] = await Neutralino.os.showOpenDialog(
    'Open a spreadsheet',
    { filters, multiSelections: false }
  );

  /* read data into an ArrayBuffer */
  const ab = await Neutralino.filesystem.readBinaryFile(filename);

  /* parse with SheetJS */
  const wb = XLSX.read(ab);
  return wb;
}
At this point, standard SheetJS utility functions5 can extract data from the
workbook object. The demo includes a button that calls sheet_to_html6 to
generate an HTML TABLE and add to the DOM:
const open_button_callback = async() => {
  const wb = await openFile();

  /* get the first worksheet */
  const ws = wb.Sheets[wb.SheetNames[0]];

  /* get data from the first worksheet */
  const html = XLSX.utils.sheet_to_html(ws);

  /* display table */
  document.getElementById('info').innerHTML = html;
};
Writing Files
There are three steps to reading files:
1) Show a file dialog with Neutralino.os.showSaveDialog7. This method
resolves to the selected path.
2) Write the data with the SheetJS write method8. The output book type can
be inferred from the selected file path. Using the buffer output type9,
the method returns a Uint8Array object that plays nice with NeutralinoJS.
2) Write to file with Neutralino.filesystem.writeBinaryFile10.
The following code example defines a single function saveFile that performs
all three steps starting from a SheetJS workbook object:
const filters = [
  {name: "Excel Binary Workbook", extensions: ["xls", "xlsb"]},
  {name: "Excel Workbook", extensions: ["xls", "xlsx"]},
]

async function saveFile(wb) {
  /* show save file dialog */
  const filename = await Neutralino.os.showSaveDialog(
    'Save to file',
    { filters }
  );

  /* Generate workbook */
  const bookType = filename.slice(filename.lastIndexOf(".") + 1);
  const data = XLSX.write(wb, { bookType, type: "buffer" });

  /* save data to file */
  await Neutralino.filesystem.writeBinaryFile(filename, data);
}
The demo includes a button that calls table_to_book11 to generate a
workbook object from the HTML table:
const save_button_callback = async() => {
  /* get the table */
  const tbl = document.getElementById('info').querySelector('table');

  /* generate workbook from the table */
  const wb = XLSX.utils.table_to_book(tbl);

  await saveFile(wb);
}
Complete Example
This demo was tested in the following environments:
| OS and Version | Architecture | Server | Client | Date |
|---|---|---|---|---|
| macOS 13.5.1 | darwin-x64 | v4.14.1 | v3.12.0 | 2023-12-13 |
| macOS 14.0 | darwin-arm | v4.14.1 | v3.12.0 | 2023-10-18 |
| Windows 10 | win10-x64 | v4.14.1 | v3.12.0 | 2023-12-09 |
| Windows 11 | win11-arm | v4.14.1 | v3.12.0 | 2023-12-01 |
| Linux (HoloOS) | linux-x64 | v4.14.1 | v3.12.0 | 2024-01-26 |
| Linux (Debian) | linux-arm | v4.14.1 | v3.12.0 | 2023-12-01 |
The app core state will be the HTML table. Reading files will add the table to the window. Writing files will parse the table into a spreadsheet.
Installation Notes (click to show)
NeutralinoJS uses portable-file-dialogs12 to show open and save dialogs. On
Linux, Zenity or KDialog are require.
The last Debian test was run on a system using LXDE. KDialog is supported but must be explicitly installed:
sudo apt-get install kdialog
1) Create a new NeutralinoJS app:
npx @neutralinojs/neu create sheetjs-neu
cd sheetjs-neu
2) Download the SheetJS Standalone script and move to the resources/js/
subdirectory in the sheetjs-neu folder:
curl -L -o resources/js/xlsx.full.min.js https://cdn.sheetjs.com/xlsx-0.20.1/package/dist/xlsx.full.min.js
3) Add the highlighted line to neutralino.config.json in nativeAllowList:
  "nativeAllowList": [
    "app.*",
    "os.*",
    "filesystem.*",
    "debug.log"
  ],
There may be multiple nativeAllowList blocks in the configuration file. The
line must be added to the first block.
4) Replace the contents of resources/index.html with the following code:
<!DOCTYPE html>
<html>
  <head>
    <meta charset="UTF-8">
    <title>SheetJS + NeutralinoJS</title>
    <link rel="stylesheet" href="styles.css">
  </head>
  <body>
    <div id="neutralinoapp">
      <h1>SheetJS × NeutralinoJS</h1>
      <button onclick="importData()">Import Data</button>
      <button onclick="exportData()">Export Data</button>
      <div id="info"></div>
    </div>
    <script src="js/neutralino.js"></script>
    <!-- Load the browser build and make XLSX available to main.js -->
    <script src="js/xlsx.full.min.js"></script>
    <script src="js/main.js"></script>
  </body>
</html>
5) Append the following code to resources/styles.css to center the table:
#info {
    width:100%;
    text-align: unset;
}
table {
    margin: 0 auto;
}
6) Print the version number in the showInfo method of resources/js/main.js:
function showInfo() {
    document.getElementById('info').innerHTML = `
        ${NL_APPID} is running on port ${NL_PORT}  inside ${NL_OS}
        <br/><br/>
        <span>server: v${NL_VERSION} . client: v${NL_CVERSION}</span>
        <br/><br/>
        <span>SheetJS version ${XLSX.version}</span>
        `;
}
7) Run the app:
npx @neutralinojs/neu run
The app should print SheetJS Version 0.20.1
8) Add the following code to the bottom of resources/js/main.js:
(async() => {
  const ab = await (await fetch("https://sheetjs.com/pres.numbers")).arrayBuffer();
  const wb = XLSX.read(ab);
  const ws = wb.Sheets[wb.SheetNames[0]];
  document.getElementById('info').innerHTML = XLSX.utils.sheet_to_html(ws);
})();
9) Close the app and relaunch the app with npx @neutralinojs/neu run
When the app loads, a table should show in the main screen.
10) Add importFile and exportFile to the bottom of resources/js/main.js:
async function importData() {
  /* show open dialog */
  const [filename] = await Neutralino.os.showOpenDialog('Open a spreadsheet');

  /* read data */
  const ab = await Neutralino.filesystem.readBinaryFile(filename);
  const wb = XLSX.read(ab);

  /* make table */
  const ws = wb.Sheets[wb.SheetNames[0]];
  document.getElementById('info').innerHTML = XLSX.utils.sheet_to_html(ws);
}

async function exportData() {
  /* show save dialog */
  const filename = await Neutralino.os.showSaveDialog('Save to file');

  /* make workbook */
  const tbl = document.getElementById('info').querySelector("table");
  const wb = XLSX.utils.table_to_book(tbl);

  /* make file */
  const bookType = filename.slice(filename.lastIndexOf(".") + 1);
  const data = XLSX.write(wb, { bookType, type: "buffer" });
  await Neutralino.filesystem.writeBinaryFile(filename, data);
}
11) Close the app and re-run with npx @neutralinojs/neu run
When the app loads, click the "Import File" button and select a spreadsheet to see the contents.
If no dialog is displayed, see the "Installation Notes" for more details. On Linux ARM64, KDialog or Zenity must be installed.
Click "Export File" and enter SheetJSNeu.xlsx to write a new file.
When saving the file, the actual file extension must be included. Attempting to
save as SheetJSNeu will not automatically add the .xlsx extension!
12) Build production apps:
npx @neutralinojs/neu build
Platform-specific programs will be created in the dist folder. For example,
the darwin-arm program will be ./dist/sheetjs-neu/sheetjs-neu-mac_arm64
- See
nativeAllowListin the NeutralinoJS documentation↩ - See
os.showOpenDialogin the NeutralinoJS documentation↩ - See
filesystem.readBinaryFilein the NeutralinoJS documentation↩ - See
readin "Reading Files"↩ - See "Utility Functions"↩
- See "HTML Table Output" in "Utility Functions"↩
- See
os.showSaveDialogin the NeutralinoJS documentation↩ - See
writein "Writing Files"↩ - See "Supported Output Formats"↩
- See
filesystem.writeBinaryFilein the NeutralinoJS documentation↩ - See "HTML Table Input" in "Utility Functions"↩
- See [the list of supported
portable-file-dialogs] (https://github.com/samhocevar/portable-file-dialogs#status)↩