4.2 HTML Elements for Structuring Text用于构建文本的HTML元素
This section describes the HTML elements for grouping or structuring plain text content, such as paragraph text or a line break. 本节介绍用于对纯文本内容(如段落文本或换行符)进行分组或结构化的HTML元素。This has nothing to do with dividing an HTML document into individual sections or areas. You’ve previously learned how to do that in Section 4.1.这与将HTML文档划分为单独的部分或区域无关。您之前在第4.1节中已经学习了如何做到这一点。
|
|
|
|---|---|
|
|
|
|
|
|
|
|
|
|
|
|
|
|
|
|
|
|
|
|
|
|
|
|
|
|
|
|
|
|
|
|
|
|
|
|
|
|
|
|
|
|
|
|
|
Table 4.2
Brief Overview of the Elements Covered Here for Grouping and Dividing Content此处用于分组和划分内容的要素概述
4.2.1 Adding Text Paragraphs Using <p>使用<p>添加文本段落
The p element (p = paragraph) is the classic element for text paragraphs in a longer continuous text. p元素(p=paragraph)是较长连续文本中文本段落的经典元素。Anything you write here between the opening 您在开头<p> and the closing </p> is treated as a text paragraph. <p>和结尾</p>之间写的任何内容都被视为文本段落。Within such a text paragraph you can use images, videos, audio clips, or other text markup in addition to multiline body text. 在这样的文本段落中,除了多行正文外,您还可以使用图像、视频、音频剪辑或其他文本标记。However, you can’t use other group elements, headings但是,您不能在(<h1> to <h6>), or section elements within <p> and </p>.<p>和</p>中使用其他组元素、标题(<h1>到<h6>)或节元素。
The following example demonstrates two slightly longer paragraph texts with the 以下示例演示了使用p element in use:p元素的两个稍长的段落文本:
...
  <body>
  ...
  <h2>News on HTML</h2>
  <article>
    <h3>A preview of the new HTML elements</h3>.
    <p>Lorem ipsum dolor sit amet, consectetuer adipiscing
       elit. Aenean commodo ligula eget dolor. Aenean massa.
       Cum sociis natoque penatibus et magnis dis parturient
       montes, nascetur ridiculus mus. Donec quam felis,
       ultricies nec, pellentesque eu, pretium quis, sem.
       Nulla consequat massa quis enim. Donec pede justo,
       fringilla vel, aliquet nec, vulputate eget, arcu. In
       enim justo, rhoncus ut, imperdiet a, venenatis vitae,
       justo.
    </p>
    <p>Nullam dictum felis eu pede mollis pretium. Integer
       tincidunt. Cras dapibus. Vivamus elementum semper
       nisi. Aenean vulputate eleifend tellus. Aenean leo
       ligula, porttitor eu, consequat vitae, eleifend ac,
       enim. Aliquam lorem ante, dapibus in, viverra quis,
       feugiat a, tellus.
    </p>
  </article>
  ...
  </body>
...
Listing 4.9 /examples/chapter004/4_2_1/index.html
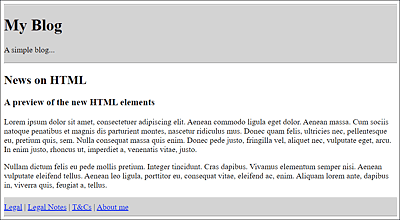
Figure 4.11
Two Paragraphs with Body Text between <p> and </p> Displayed in the Web Browser在Web浏览器中显示正文在<p>和</p>之间的两个段落
Aligning and Formatting Paragraph Text Using CSS使用CSS对齐和格式化段落文本
Paragraph text with the 带有p element can be formatted using CSS or CSS features.p元素的段落文本可以使用CSS或CSS功能进行格式化。
4.2.2 Forcing Line Breaks Using <br>使用<br>强制断线
If you try to insert a line break or a space in the body text of the example just shown, /examples/chapter004/4_2_1/index.html, you’ll notice that it doesn’t work. 如果你试图在刚刚显示的示例的正文中插入换行符或空格,/examples/chapter004/4_2_1/index.html,你会注意到它不起作用。The point at which the line break is supposed to be inserted is decided by the web browser based on a space that separates words. 换行符应该插入的点由网络浏览器根据分隔单词的空格决定。Nevertheless, you can also force a line break at a certain point in the text using 然而,您也可以使用<br> (br = break). <br>(br=break)在文本中的某个点强制换行。<br> is a standalone tag. Even though you can use multiple line breaks simultaneously via <br>, you shouldn’t overuse it for separating paragraphs.<br>是一个独立的标签。即使您可以通过<br>同时使用多个换行符,也不应该过度使用它来分隔段落。
The following example is commonly used to represent an address neatly by means of forced line breaks (see Figure 4.12):以下示例通常用于通过强制换行整齐地表示地址(见图4.12):
...
    Written by <a href="mailto:#">John</a><br>
    <address>
       John Doe<br>
       Sample Town<br>
       www.address.com
    </address>
...
Listing 4.10 /examples/chapter004/4_2_2/index.html
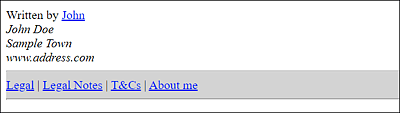
Figure 4.12
You Can Force Line Breaks via the <br> Element您可以通过<br>元素强制断线
4.2.3 Adding Optional Line Breaks Using <wbr>使用<wbr>添加可选换行符
If, on the other hand, you need an optional line break that only occurs at a specific position when it’s necessary for an optimal display in the web browser and to save the user from scrolling sideways, you can use the standalone 另一方面,如果您需要一个可选的换行符,该换行符仅在需要在web浏览器中实现最佳显示并避免用户横向滚动时发生在特定位置,则可以使用独立的<wbr> (or <wbr /> in XHTML) tag for this (wbr = word break). <wbr>(或XHTML中的<wbr/>)标签来实现(wbr = word break)。<wbr> can be quite useful if you want to prevent the web browser from breaking a line in the wrong place. A simple example follows:<wbr>可能非常有用。下面是一个简单的例子:
<p>Taumatawhakatangi<wbr>
hangakoauauotamatea<wbr>
turipukakapikimaungah<wbr>
oronukupokaiwhen<wbr>
uakitanatahu</p>
Depending on how wide the display section is in the web browser, the long word can be wrapped only at the places where 根据web浏览器中显示部分的宽度,长单词只能在插入<wbr> was inserted.<wbr>的位置换行。
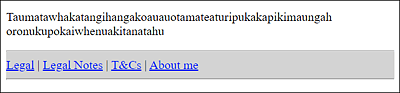
Figure 4.13
An Extremely Long Word Wrapped at a Position Suggested by <wbr>用<wbr>建议的位置包裹的超长单词
Line Break via <wbr>通过<wbr>断行
The optional line break via 稍后,通过<wbr> was added to the standard HTML version at a later time, but it had been around since HTML 2.0. The Netscape web browser had introduced this element a long time ago, and other browser manufacturers had implemented it as well.<wbr>的可选换行符被添加到标准HTML版本中,但它自HTML 2.0以来就已经存在了。Netscape网络浏览器很久以前就引入了这一元素,其他浏览器制造商也实现了这一点。
Nevertheless, this word separation is unattractive because the line gets broken without consideration of a grammatically correct separation. 然而,这种单词分隔并不吸引人,因为如果不考虑语法正确的分隔,这条线就会断开。As an alternative, the named entity作为替代方案,命名实体 ­ is suitable for a conditional hyphen. ­适用于条件连字符。Similar to 与<wbr>, this allows the web browser to separate the word at this point if necessary. <wbr>类似,这允许网络浏览器在必要时在此时分隔单词。Unlike 与<wbr>, the web browser adds a hyphen at the end of the wrapped word. The alternative example looks as follows:<wbr>不同,web浏览器在包裹的单词末尾添加了一个连字符。另一个例子如下:
<p>Taumatawhakatangi­
hangakoauauotamatea­
turipukakapikimaungah­
oronukupokaiwhen­
uakitanatahu</p>
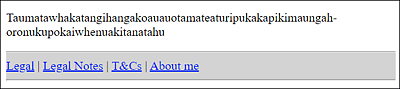
Figure 4.14
A Long Word Can Also Be Wrapped at the Position Suggested by “­” but It Also Adds a Separator, Unlike <wbr>一个长单词也可以用“andsy;”建议的位置包裹,但它也添加了一个分隔符,与<wbr>不同
4.2.4 Forcing Spaces and Preventing Wrapping Using " "使用“ ”强制空格和防止折行
If you want to insert multiple spaces between two words, you can force this with the named character 如果要在两个单词之间插入多个空格,可以使用命名字符 (  = nonbreaking space). Let’s take a look at a simple example: 强制执行此操作(  = nonbreaking space)。让我们来看一个简单的例子:
<p>word1 word2</p>
<p>word3 word4</p>
Between 在word1 and word2, the named HTML entity character has been written four times, resulting in four spaces between these two words, which is also displayed by the web browser. word1和word2之间,命名的HTML实体字符 已经写了四次,导致这两个单词之间有四个空格,这也会由网络浏览器显示。In the example with 在word3 and word4 the same was tried by pressing the spacebar four times. Nevertheless, in this case, the web browser displays only one space between the words.word3和word4的示例中,通过按空格键四次来尝试相同的操作。然而,在这种情况下,网络浏览器在单词之间只显示一个空格。
In addition to forcing a space, you can also use the named entity character 除了强制使用空格外,您还可以使用命名实体字符和nbsp;以防止两个单词之间的中断,当行尾空间不足时,网络浏览器会自动执行此操作。例如: to prevent a break between two words, which the web browser automatically performs when there is insufficient space at the end of a line. For example:
... word1 word2 ...
By placing this 通过在 between word1 and word2, you can prevent the two words from being split between two different lines by the web browser if there’s a lack of space. word1和word2之间放置此 ,如果空间不足,您可以防止网络浏览器将这两个单词拆分为两行。word1 and word2 thus stick together in the same line forever.word1和word2永远粘在一起。
4.2.5 Adding a Topic-Based Separation Using <hr>使用<hr>添加基于主题的分隔
You can use 您可以使用<hr> to create a topic-based separation in an HTML document, for example, to separate content more clearly. <hr>在HTML文档中创建基于主题的分隔,例如,更清楚地分隔内容。However, even though 然而,即使<hr> is visualized as a separator in HTML by web browsers, the element is also to be treated as a semantic element and not a presentation element. <hr>在HTML中被web浏览器视为分隔符,该元素也应被视为语义元素,而不是表示元素。For example, it isn’t valid HTML to use the 例如,在hr element between <p> and </p> or within a heading (<h1> to <h6>), even though web browsers are quite fault-tolerant about this.<p>和</p>之间或在标题(<h1>到<h6>)内使用hr元素是无效的HTML,尽管web浏览器对此非常容错。
The example shown in Figure 4.15 with a horizontal line can be found under /examples/chapter004/4_2_5/index.html. You’ll see that a separator line also creates a paragraph.图4.15中显示的带有水平线的示例可以在/examples/chapter004/4_2_5/index.html下找到。您将看到分隔线也会创建一个段落。
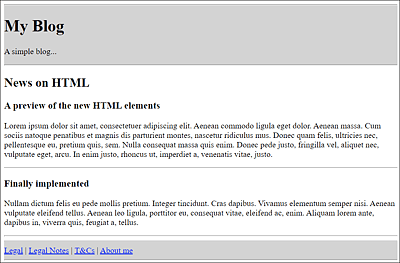
Figure 4.15
With <hr>, a Visual Topic-Based Separation Has Been Added as a Separator Line behind the Paragraph Text使用<hr>,在段落文本后面添加了一个基于主题的视觉分隔符作为分隔行
4.2.6 Adding Paragraphs or Citations Using <blockquote>使用<blockquote>添加段落或引用
Between 在<blockquote> and </blockquote>, you can quote a text from another source. Most web browsers indent the text in a new paragraph. Within such block quotes, you can use other HTML elements besides text.<blockquote>和</blockquote>之间,您可以引用其他来源的文本。大多数网络浏览器在新段落中缩进文本。在这样的块引号中,除了文本之外,您还可以使用其他HTML元素。
The blockquote element contains cite, an HTML attribute that allows you to specify the source of the citation. blockquote元素包含cite,这是一个HTML属性,允许您指定引用的来源。With regard to books, this can also be a link to the corresponding book page or to a store where this book can be purchased. Unfortunately, no web browser provides the option to somehow make this source visible or to call the corresponding URL yet. 关于书籍,这也可以是指向相应书籍页面或购买此书的商店的链接。不幸的是,目前还没有网络浏览器提供以某种方式使此源可见或调用相应URL的选项。So, to be on the safe side, you should add the source, as I did in the following example; in Figure 4.16, you can see the display in the web browser.因此,为了安全起见,您应该添加源代码,就像我在以下示例中所做的那样;在图4.16中,您可以在web浏览器中看到显示。
...
<blockquote cite="http://www.blindtextgenerator.com/">
   Nulla consequat massa quis enim. Donec pede justo,
   fringilla vel, aliquet nec, vulputate eget, arcu. In enim
   justo, rhoncus ut, imperdiet a, venenatis vitae, justo.
   <small> - http://www.blindtextgenerator.com/ - </small>
</blockquote>
...
Listing 4.11 /examples/chapter004/4_2_6/index.html
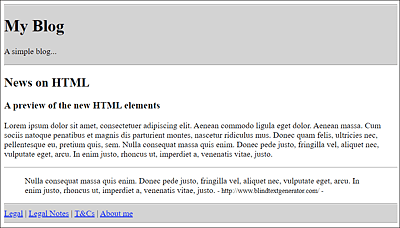
Figure 4.16
Text Quoted between <blockquote> and </blockquote> from the www.blindtextgenerator.com Website引用自www.blindtextgenerator.com网站的<blockquote>和</blockquote>之间的文本
4.2.7 Defining a General Section Using <div>使用<div>定义通用部分
Between 在<div> and </div> (div = division), you can define a general section, which at first usually does nothing but create a new line. <div>和</div>(div=division)之间,您可以定义一个通用部分,该部分最初通常只会创建一行。This 在CSS发挥作用之前,这个div element doesn’t have any meaning until CSS comes into play, which is the main use of <div>: defining layout sections. div元素没有任何意义,这是<div>的主要用途:定义布局部分。In the following example, the HTML attribute 在下面的示例中,使用了HTML属性class was used, which you can use to assign the div elements to a class that you can later select with CSS (using a selector) and visually customize or style. class,您可以使用它将div元素分配给一个类,稍后可以使用CSS(使用选择器)选择该类,并对其进行视觉自定义或样式设置。Here’s a familiar example that demonstrates such an application in use:下面是一个熟悉的示例,演示了如何使用这样的应用程序:
...
  <body>
  <div class="header">
    <hr />
    <h1>My Blog</h1>
    <p>A simple blog ...</p>
    <hr />
  </div>
  <h2>News on HTML</h2>
  <div class="article">
    <h3>A preview of the new HTML elements</h3>
    <p>Lorem ipsum dolor ...</p>
  </div>
  <div class="footer">
    <hr />
    <a href="#">Legal</a> |
    <a href="#">Legal Notes</a> |
    <a href="#">T&Cs</a> |
    <a href="#">About me</a>
    <hr />
  </div>
  </body>
...
Listing 4.12 /examples/chapter004/4_2_7/index.html
For such examples, you should prefer semantic elements such as 对于这样的例子,你应该更喜欢<header>, <footer>, <article>, <nav>, and so on instead of the div element.<header>、<footer>、<article>、<nav>等语义元素,而不是div元素。
Therefore, you should use the 因此,只有当没有其他合适的HTML元素可用时,才应该使用div element only if no other suitable HTML element is available. div元素。You can find more information about this in greater detail in Section 4.3. 您可以在第4.3节中找到更多详细信息。In regard to the /examples/chapter004/4_2_7/index.html example, you should, as previously described in the book, use the HTML elements 关于/examples/chapter004/4_2_7/index.html示例,如本书前面所述,您应该使用HTML中新引入的HTML元素<header>, <article>, and <footer> that have been newly introduced in HTML instead of the <div class="header">, <div class="article">, and <div class="footer"> sections used in the previous example. <header>、<article>和<footer>,而不是前一个示例中使用的<div class="header">、<div class="article">和<div class="footer">部分。The corresponding example thus looks as follows (see Listing 4.13).相应的示例如下(参见清单4.13)。
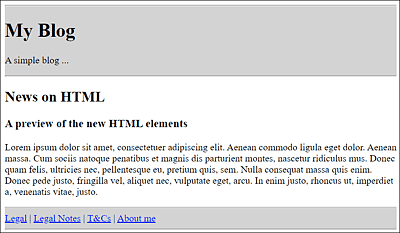
Figure 4.17
The Header and Footer of the HTML Document Appear in GrayHTML文档的页眉和页脚显示为灰色
...
  <body>
  <header>
    <hr />
    <h1>My Blog</h1>
    <p>A simple blog ...</p>
    <hr />
  </header>
  <h2>News on HTML</h2>
  <article>
    <h3>A preview of the new HTML elements</h3>
    <p>Lorem ipsum dolor ... </p>
  </article>
  <footer>
    <hr />
    <a href="#">Legal</a> |
    <a href="#">Legal Notes</a> |
    <a href="#">T&Cs</a> |
    <a href="#">About me</a>
    <hr />
  </footer>
  </body>
...
Listing 4.13 /examples/chapter004/4_2_7/index2.html
4.2.8 Using <main>: An HTML Element for the Main Content使用<main>:一个HTML元素作为主要内容
I described the 我在上一节中描述了div element in the previous section, so it makes sense to deal with the main element at this point. div元素,因此此时处理main元素是有意义的。Where 其中<div id="main">...</div> was used in the past, you can use <main>...</main> from now on. <div id="main">...</div>以前用过,从现在开始你可以用<main>...</main>。The id attribute identifies an element that occurs only once within a document.id属性标识一个在文档中只出现一次的元素。
Like all other new HTML elements, you should use the 与所有其他新的HTML元素一样,您应该尽可能合理地使用main element as sensibly as possible. main元素。In practice, you use it for the main content of a website, which means it’s best not to place it inside 在实践中,您将其用于网站的主要内容,这意味着最好不要将其放置在<article>, <aside>, <footer>, <nav>, or header elements.<article>、<aside>、<footer>、<nav>或header元素中。
In the web browser, the 在web浏览器中,main element is rendered like the div element with no special properties and only creates a line break. main元素呈现为div元素,没有特殊属性,只创建换行符。However, unlike the 然而,与div element, you should use the main element only once (visibly) in an HTML document. div元素不同,您应该在HTML文档中只使用一次main元素(可见)。In contrast to the 与<section> element, the main element isn’t a section element, but a pure grouping element. <section>元素相比,main元素不是section元素,而是纯分组元素。Thus, the use of such a section doesn’t affect the heading structure (the document outline) of the HTML document.因此,使用这样的部分不会影响HTML文档的标题结构(文档大纲)。
Here’s an example of how you can group a section as the main section of a web page:以下是一个示例,说明如何将一个部分分组为网页的主要部分:
...
  <body>
  <header>
    <h1>My Blog</h1>
    <p>A simple blog ...</p>
  </header>
  <main>
    <h2>News on HTML</h2>
    <article>
      <h3>A preview of the new HTML elements</h3>
      <p>Lorem ipsum dolor...</p>
    </article>
  </main>
  <footer>
    <a href="#">Legal</a> |
    <a href="#">Legal Notes</a> |
    <a href="#">T&Cs</a> |
    <a href="#">About me</a>
  </footer>
  </body>
...
Listing 4.14 /examples/chapter004/4_2_8/index.html
Using <main> Multiple Times?多次使用<main>?
<main> is intended to present the main content of an HTML document and should therefore be included only once in a document. <main>旨在呈现HTML文档的主要内容,因此在文档中只应包含一次。If it’s used more than once, then this page won’t pass the validation check. Nevertheless, there are single-page web applications, that is, applications that consist of a single HTML document and whose content is dynamically reloaded, where this rule can become an issue. 如果它被使用了多次,那么此页面将无法通过验证检查。然而,也有单页web应用程序,即由单个HTML文档组成的应用程序,其内容是动态重新加载的,在这种情况下,此规则可能会成为一个问题。For this reason, the use of the 因此,main element has been adjusted somewhat, and multiple main elements can now be used. main元素的使用已经有所调整,现在可以使用多个主元素。However, only one 但是,一次只能看到其中的一个<main> element of those can be visible at a time. All other main elements must be provided with the hidden attribute. For example:<main>元素。所有其他main元素都必须提供hidden属性。例如:
<main>...</main>
<main hidden>...</main>
<main hidden>...</main>
Although there are other ways in CSS to hide individual elements, you can use only the 尽管CSS中还有其他隐藏单个元素的方法,但您只能使用带有hidden attribute with <main> for the HTML document to be valid. All other options are invalid.<main>的hidden属性来使HTML文档有效。所有其他选项均无效。
4.2.9 Labeling Content Separately Using <figure> and <figcaption>分别使用<figure>和<figcaption>标记内容
To set off or group certain content such as tables, images, listings, videos, or other HTML elements from the usual body text, you can use the 要从通常的正文文本中设置或分组某些内容,如表格、图像、列表、视频或其他HTML元素,可以使用figure element. figure元素。If you want to link this section with an (optional) caption, you should use the 如果你想用(可选)标题链接此部分,你应该使用figcaption element. figcaption元素。Like the 与figure element, the figcaption element can contain other HTML elements besides ordinary body text. figure元素一样,figcaption元素可以包含除普通正文之外的其他HTML元素。Thus, the 因此,figure element serves as the semantic parent for an element belonging to the page content, such as an image, table, listing, or other content, and the figcaption element encloses the subtitle to that element.figure元素充当属于页面内容的元素(如图像、表格、列表或其他内容)的语义父元素,而figcaption元素则包含该元素的副标题。
Here’s a simple example, the result of which is shown in Figure 4.18:这是一个简单的例子,其结果如图4.18所示:
...
  <h2>HTML</h2>
  <article>
    <h3>figure and figcaption in use</h3>
    <p>The text before figure ...</p>
    <figure>
      <img src="opera.jpg" alt="Chinese Opera" />
      <figcaption>Figure 1: Once upon a time ...</figcaption>
      </figure>
    <p>The text after figure</p>
  </article>
...
Listing 4.15 /examples/chapter004/4_2_9/index.html
If you want to place the (optional) caption with the 如果你想将带有figcaption element before the content (above the image in the example), you need to use the element right after the opening <figure>. figcaption元素的(可选)标题放在内容之前(在示例中的图像上方),你需要在打开<figure>后立即使用该元素。However, it’s only possible to use a 但是,只能在figcaption element between <figure> and </figure>, and <figcaption> must be the first or last element of the figure element.<figure>和</figue>之间使用figcaption元素,并且<figcaption>必须是figure元素的第一个或最后一个元素。

Figure 4.18
In the <article> Element between <figure> and </figure>, an Image Has Been Inserted with the <img> Element and a Caption with the <figcaption> Element在<figure>和</figue>之间的<article>元素中,插入了带有<img>元素的图像和带有<figcaption>元素的标题
Between 在<figure> and </figure> you can also use more than one content type (e.g., an image in the example). <figure>和</figue>之间,您还可以使用多种内容类型(例如,示例中的图像)。In the web browser, a 在web浏览器中,figure usually doesn’t get displayed separately. In addition to a separate line, the content between <figure> and </figure> is often displayed slightly indented. figure通常不会单独显示。除了单独的一行外,<figure>和</figue>之间的内容通常会略微缩进显示。However, CSS is used for the design of the 然而,CSS无论如何都用于figure element anyway.figure元素的设计。
4.2.10 Creating Unordered Lists Using <ul> and <li>使用<ul>和<li>创建无序列表
An unordered list is basically nothing more than an unnumbered bulleted list in which all list entries are given a bullet character. The web browsers usually display this bullet with a bullet point.无序列表基本上只不过是一个无编号的项目符号列表,其中所有列表条目都被赋予一个项目符号字符。网络浏览器通常会显示带有项目符号的项目符号。
You can introduce such a list with an opening 你可以用一个开头<ul> (ul = unordered list), followed by the actual bullet points, which you write between <li> and </li>. <ul>(ul = unordered list)来引入这样一个列表,后面是你在<li>和</li>之间写的实际项目符号。Each 每个li element (li = list item) is a bullet point. li元素(li = list item)都是一个圆点。At the end, you must end the unordered bullet list with the closing 最后,您必须以关</ul>. </ul>结尾结束无序项目符号列表。Only li elements can be contained between <ul> and </ul>. <ul>和</ul>之间只能包含li元素。In between the 在li elements, you can also use other HTML elements (except for section elements).li元素之间,您还可以使用其他HTML元素(section元素除外)。
Here’s a simple example of an unordered list, the execution of which you can see in Figure 4.19.这是一个无序列表的简单示例,其执行过程如图4.19所示。
...
<article>
  <h2>Unordered bullet list with ul</h2>
  <ul>
     <li>Lorem ipsum dolor sit amet</li>
     <li>Donec quam felis ultricies</li>
     <li>Nulla consequat massa quis</li>
     <li>Etiam ultricies nisi vel</li>
     <li>Donec vitae sapien ut libero</li>
  </ul>
</article>
...
Listing 4.16 /examples/chapter004/4_2_10_15/index.html
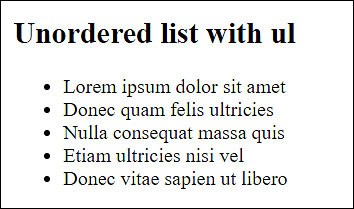
Figure 4.19
Bulleted Lists with the <ul> Element Are Usually Displayed with a Bullet Point带有<ul>元素的项目符号列表通常会显示一个项目符号点
4.2.11 Creating Ordered Lists Using <ol> and <li>使用<ol>和<li>创建有序列表
What you’ve just read about the 你刚才读到的关于ul元素的内容也适用于ul element also applies to the ol element (ol = ordered list). ol元素(ol = ordered list)。The only exception is that the 唯一的例外是ol element is an ordered list—more precisely, a numbered list in which the individual li elements are automatically numbered.ol元素是一个有序列表,更确切地说,是一个编号列表,其中各个li元素会自动编号。
Here’s an example of an ordered list, the execution of which you can see in Figure 4.20.这是一个有序列表的示例,其执行过程如图4.20所示。
...
<article>
  <h2>Numbered bullet list with ol</h2>
  <ol>
     <li>Lorem ipsum dolor sit amet</li>
     <li>Donec quam felis ultricies</li>
     <li>Nulla consequat massa quis</li>
     <li>Etiam ultricies nisi vel</li>
     <li>Donec vitae sapien ut libero</li>
  </ol>
</article>
...
Listing 4.17 /examples/chapter004/4_2_10_15/index.html
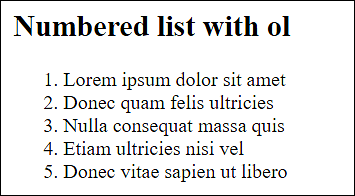
Figure 4.20
The Numbered List with the <ol> Element Uses Arabic Numerals by Default默认情况下,带有<ol>元素的编号列表使用阿拉伯数字
4.2.12 Reversing the Numbering of an Ordered List颠倒有序列表的编号
With HTML, it’s also possible to reverse the order of numbering via the HTML attribute 使用HTML,还可以通过在开放reversed in the opening <ol> tag, so that the numbering gets displayed in descending order. Based on the preceding example, you only need to insert the following:<ol>标签中反转HTML属性来reversed编号顺序,这样编号就可以按降序显示。基于前面的示例,您只需插入以下内容:
<ol reversed="reversed">
   ...
</ol>
Besides 除了<ol reversed="reversed">, you can also just use <ol reversed> here because it’s a standalone attribute. But if you want to be XHTML compliant, you must use the form <ol reversed="reversed">. In HTML, you can use both versions.<ol reversed="reversed">之外,您还可以在这里使用<ol reversed>,因为它是一个独立的属性。但是,如果你想符合XHTML,你必须使用<ol reversed="reversed">的形式。在HTML中,您可以同时使用这两个版本。
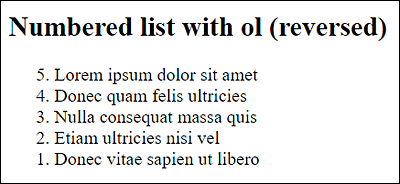
Figure 4.21
The Numbering Order Was Reversed via the “reversed” Attribute通过“反转”属性反转编号顺序
4.2.13 Changing the Numbering of an Ordered List更改有序列表的编号
You can use the HTML attribute您可以使用HTML属性 start to specify the start value of the first li element in the opening <ol> tag. start指定开<ol>标记中第一个li元素的起始值。All values that follow the first 第一个li element are incremented by the value 1. li元素后面的所有值都将按值1递增。Even within an opening 即使在<li> tag, you can use the HTML attribute value to change the numbering of the list entry. <li>标签的开头,您也可以使用HTML属性值更改列表条目的编号。All subsequent entries are incremented by the value 所有后续条目都使用1 using the value specified in value.value中指定的值按值1递增。
The execution of the following example is shown in Figure 4.22.以下示例的执行如图4.22所示。
...
<ol start="20">
  <li>Lorem ipsum dolor sit amet</li>
  <li>Donec quam felis ultricies</li>
  <li>Nulla consequat massa quis</li>
  <li value="101">Etiam ultricies nisi vel</li>
  <li>Donec vitae sapien ut libero</li>
</ol>
...
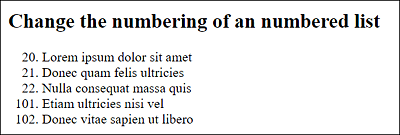
Figure 4.22
The Starting Numbering Was Set to 20 Right in the Opening <ol> Tag with the Attribute “start” and Then Again in an Opening <li> Tag with the Attribute “value” to 101在属性为“start”的开局<ol>标签中,起始编号设置为20,然后在属性为101的开局<li>标签中再次设置为101
4.2.14 Nesting Lists within Each Other相互嵌套列表
You can nest both numbered lists and bulleted lists. Such nested lists are used when, for example, you need a finer structuring of the lists, such as a table of contents (e.g., at the beginning of this book). A navigation with submenus is also often formulated by means of a bulleted list.您可以嵌套编号列表和项目符号列表。例如,当您需要更精细的列表结构时,例如目录(例如,在本书的开头),就会使用这种嵌套列表。带有子菜单的导航通常也通过项目符号列表来制定。
Nesting lists can get a little messy, so if you have a deeper bulleted hierarchy, you should use indentations and/or add a comment. 嵌套列表可能会有点混乱,所以如果你有一个更深的项目符号层次结构,你应该使用缩进和/或添加注释。When nesting, the 嵌套时,li elements aren’t nested inside each other, as might be assumed, but a ul or ol element must be written again with the nested li elements inside an opening parent <li> tag. li元素不会像可能假设的那样相互嵌套,但ul或ol元素必须与嵌套的li元素一起再次写入打开的父<li>标记中。Only when you close the opening 只有当您用<li> tag with </li> will this list be marked and displayed as a child list.</li>关闭打开的<li>标记时,此列表才会被标记并显示为子列表。
The execution of the following code snippet is shown in Figure 4.23.以下代码片段的执行如图4.23所示。
...
<h2>Nesting bullet lists ul</h2>
<ul>
  <li>Lorem ipsum dolor sit amet
  <ul><!-- Start: 1. Nesting -->
     <li>Donec quam felis ultricies</li>
     <li>Nulla consequat massa quis</li>
  </ul><!-- End: 1. Nesting -->
  </li>
  <li>Etiam ultricies nisi vel</li>
  <li>Donec vitae sapien ut libero</li>
</ul>
...
<h2>Nesting numbered lists ol</h2>
<ol>
  <li>Lorem ipsum dolor sit amet
  <ol><!-- Start: 1. Nesting -->
     <li>Donec quam felis ultricies</li>
     <li>Nulla consequat massa quis</li>
  </ol><!-- End: 1. Nesting -->
  </li>
  <li>Etiam ultricies nisi vel</li>
  <li>Donec vitae sapien ut libero</li>
</ol>
...
Listing 4.18 /examples/chapter004/4_2_10_15/index.html
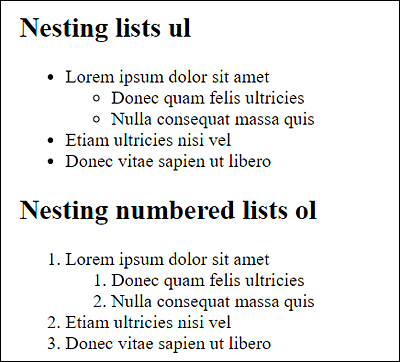
Figure 4.23
The Nesting of Unnumbered Lists and Numbered Lists during Execution执行过程中无编号列表和编号列表的嵌套
Of course, you can nest the lists even deeper. Mixing unordered and ordered lists is also possible without any problem. Unfortunately, it isn’t possible to force automatic numbering such as 1.2, 1.3, 1.4, and so on for the numbered sublists.当然,您可以将列表嵌套得更深。混合无序和有序列表也是可能的,没有任何问题。不幸的是,不可能对编号的子列表强制自动编号,如1.2、1.3、1.4等。
To illustrate this, the following is an example of a deeper and mixed nesting, the result of which is shown in Figure 4.24.为了说明这一点,下面是一个更深层次的混合嵌套示例,其结果如图4.24所示。
...
<h2>Deeper nesting and mixing lists</h2>
<ol>
  <li>Lorem ipsum dolor sit amet
  <ol><!-- Start: 1. Nesting -->
      <li>Donec quam felis ultricies</li>
      <li>Nulla consequat massa quis
      <ol><!-- Start: 2. Nesting -->
          <li>Donec quam felis ultricies</li>
          <li>Nulla consequat massa quis</li>
      </ol><!-- End: 2. Nesting -->
      </li>
  </ol><!-- End: 1. Nesting -->
  </li>
  <li>Etiam ultricies nisi vel
  <ul><!-- Start: 1. Nesting (bullet point) -->
      <li>Donec quam felis ultricies</li>
      <li>Nulla consequat massa quis</li>
  </ul><!-- End: 1. Nesting (bullet point) -->
  </li>
  <li>Donec vitae sapien ut libero</li>
</ol>
...
Listing 4.19 /examples/chapter004/4_2_10_15/index.html

Figure 4.24
Further Nesting Depths and Mixing of Ordered and Unordered Lists有序和无序列表的进一步嵌套深度和混合
Omitting the Closing Tag from Lists从列表中省略结束标记
As you may remember from Chapter 2, Section 2.1.6, it’s possible to omit the closing tags in some places. Especially if a list is deeply and extensively nested, this may even be clearer and easier than setting the closing tags. 正如您在第2章第2.1.6节中可能记得的那样,在某些地方可以省略结束标签。特别是如果一个列表是深度和广泛嵌套的,这甚至可能比设置结束标签更清晰、更容易。As mentioned earlier, this style isn’t used in this book, and I’ve never used it in practice (yet). Nevertheless, it should be pointed out here because the lists are listed as a pro-argument, especially by the “omission faction.”如前所述,这本书中没有使用这种风格,我也从未在实践中使用过。然而,这里应该指出的是,这些名单被列为支持论点,特别是“遗漏派”
4.2.15 Creating a Description List Using <dl>, <dt>, and <dd>使用<dl>、<dt>和<dd>创建描述列表
In HTML, there’s another type of list you can use—the description list. This list is more of a name-value mapping list. Typical use cases for the description list are glossaries or the listing of special metadata and values; in other words, it’s simply a special list with certain data in which a value or a description is assigned.在HTML中,您可以使用另一种类型的列表——描述列表。此列表更像是一个名称-值映射列表。描述列表的典型用例是术语表或特殊元数据和值的列表;换句话说,它只是一个包含特定数据的特殊列表,其中分配了值或描述。
A description list gets summarized between 描述列表在<dl> and </dl> (dl = description list). The dl element may only contain the dt and dd elements described in the same way. <dl>和</dl>之间进行汇总(dl = description list)。dl元素可以仅包含以相同方式描述的dt和dd元素。The expression to be described, that is, the name of the name-value mapping list, is marked with要描述的表达式,即名称-值映射列表的名称,用 <dt> and </dt> (dt = description term). <dt>和</dt>标记(dt = description term)。The associated description is written after the 相关描述写在dt element between <dd> and </dd> (dd = definition description). <dd>和</dd>之间的dt元素之后(dt = description term)。In turn, other HTML elements may be used in 反过来,dt and dd elements—except for grouping elements and HTML elements for new sections (sectioning).dt和dd元素中可以使用其他HTML元素,除了分组元素和新部分的HTML元素(分段)。
Here’s a simple example of a description list, the result of which is shown in Figure 4.25. 这是一个描述列表的简单示例,其结果如图4.25所示。By default, web browsers display the descriptions (默认情况下,web浏览器显示的描述(<dd> elements) slightly indented compared to the expression (<dt> elements). <dd>元素)与表达式(<dt>元素)相比略有缩进。Here the description list was used for a list of abbreviations in the web jargon.这里的描述列表用于网络术语中的缩写列表。
...
<h3>Web lingo</h3>
<dl>
  <dt>4U</dt>
  <dd>For you</dd>
  <dt>ACK</dt>
  <dd>Acknowledgment</dd>
  <dt>ASAP</dt>
  <dd>As soon as possible</dd>
  <dt>FYI</dt>
  <dd>For your information</dd>
</dl>
...
Listing 4.20 /examples/chapter004/4_2_10_15/index.html
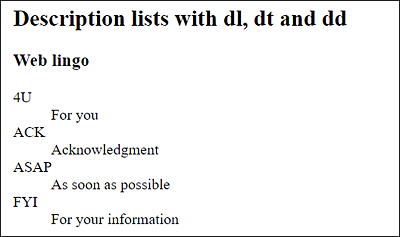
Figure 4.25
Descriptions (<dd> Elements) Slightly Indented Compared to the Expression (<dt> Elements)与表达式(<dt>元素)相比,描述(<dd>元素)略有缩进
Such a name-value pair list can also be used within other HTML elements such as between 这样的名称-值对列表也可以在其他HTML元素中使用,例如在<aside> and </aside> or the new details element, as shown in the following example:<aside>和</abide>之间或新的details元素中,如下例所示:
...
<h3>Book launch</h3>
<img src="Computer stories.png"
alt="Computer stories"><br>
<details>
  <summary>Book information:</summary>.
  <dl>
    <dt>Publisher</dt>
    <dd>Rheinwerk Verlag</dd>
    <dt>Author</dt>
    <dd>Juergen Wolf</dd>
    <dt>Scope</dt>
    <dd>400 pages</dd>
    <dt>Price</dt>
    <dd>$24.90</dd>
    <dt>ISBN</dt>
    <dd> ISBN 978-3-8362-7777-8 </dd>
  </dl>
</details>
...
Listing 4.21 /examples/chapter004/4_2_10_15/index.html
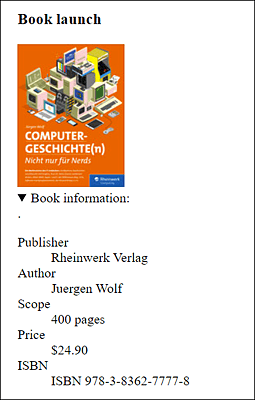
Figure 4.26
The Description List for an Image (a Book) Has Been Wrapped inside the <details> Element, Allowing the Description to be Expanded and Collapsed图像(书籍)的描述列表已被包裹在<details>元素中,允许扩展和折叠描述