Configure a generic task server
IntelliJ IDEA supports integration with many task trackers out of the box. However, if you use a tracker that IntelliJ IDEA does not support yet, you can still integrate it configuring a so called generic server.
This tutorial describes how to:
-
Connect to JIRA Cloud as a generic server.
-
Obtain the list of issues assigned to you.
-
For each issue, get its ID, title, description, date and time when the issue was created and updated.
Before you start configuring a connection to your tracker, note that IntelliJ IDEA:
-
Supports only services with REST API.
-
Supports either Basic HTTP authentication or sending preliminary requests to the server.
-
Supports GET and POST requests.
-
Does not support pagination in server responses.
Specify server URL and credentials
-
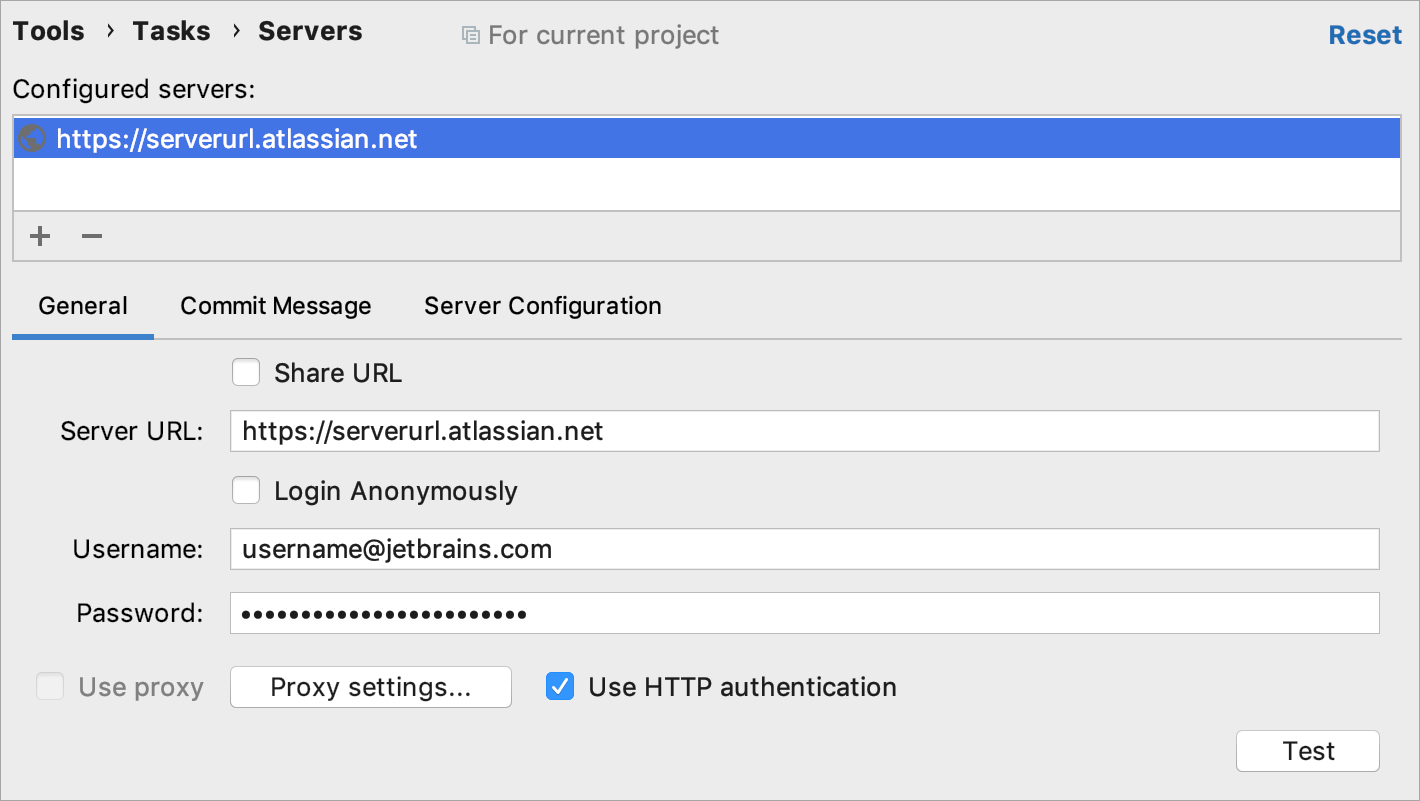
In the Settings/Preferences dialog Ctrl+Alt+S, go to .
-
Click
and select Generic.
-
On the General tab, specify the URL of your task tracker and connection credentials.
In the Username field, type your email address.
In the Password field, enter your Atlassian API token.
-
Select the Use HTTP authentication checkbox at the bottom of the dialog.

Configure the server settings
-
Switch to the Server Configuration tab.
Note that the Login URL field will be disabled, as you are using HTTP authentication.
-
In the Tasks List URL, enter the URL for obtaining issues from the server. You can use variables or enter the full URL:
{serverUrl}/rest/api/2/search or https://serverurl.atlassian.net/rest/api/2/search
The
{serverUrl}is a variable that stands for the URL you have specified on the General tab. -
Add the
?jql={JQL_Query}expression to your task list URL: {serverUrl}/rest/api/2/search?jql={JQL_Query}.
-
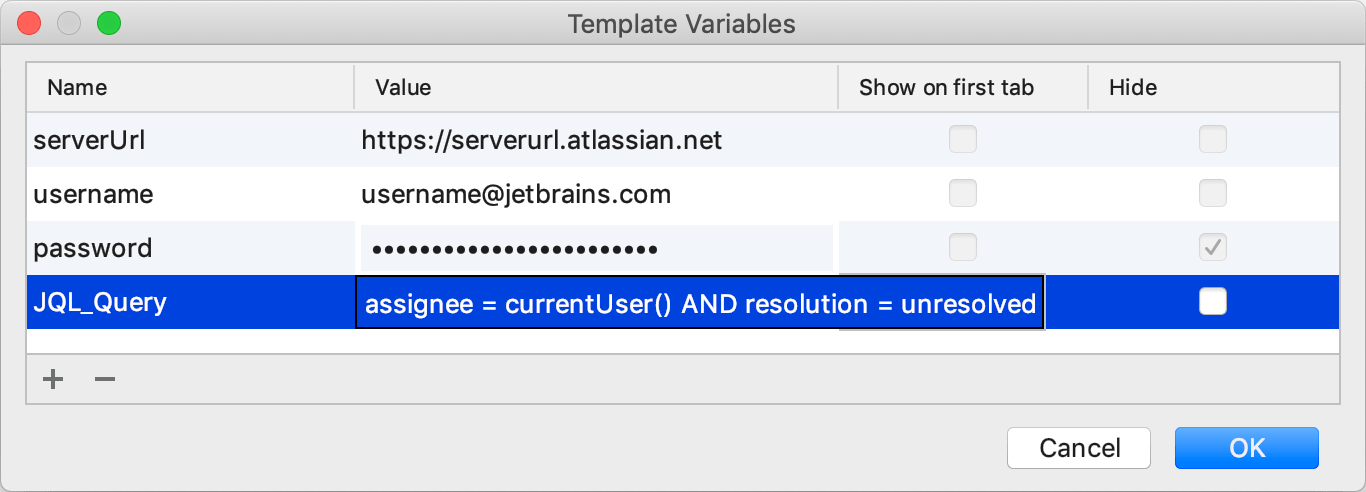
Click Manage Template Variables at the bottom of the dialog to configure the
JQL_Queryvariable. -
Click
and in the new field, specify the variable name
JQL_Queryand add its valueassignee = currentUser() AND resolution = unresolved.This will let you obtain unresolved issues assigned to you.
-
Click OK.

Configure response type and specify selectors
-
In the Server Configuration dialog, select the JSON response type.
-
Specify selectors in the table to get IDs and titles of issues and their description. You can also obtain the date and time when issues were created and updated:
-
tasks:
$.issues -
id:
key -
summary:
fields.summary -
description:
fields.description -
updated:
fields.updated -
created:
fields.created
-
-
Click Test to make sure all parameters are configured correctly.

Upload issues from the server
-
Click the tasks combo and select Open Task. IntelliJ IDEA will load from the server all issues that match your configuration.
-
Select the necessary issue from the list.
-
Press Ctrl+Q to open issue description and make sure all required details are obtained.