Deploy a Java web application inside a Wildfly server container
You can use Docker to run a Wildfly server and deploy your Java web applications on it. This tutorial describes how to create a simple Java web application, build a deployable web application resource (WAR) file, and then deploy it inside a Wildfly server running as a Docker container.
Before you begin, make sure that Docker integration is properly configured.
Create a Java web application
-
From the main menu, select .
-
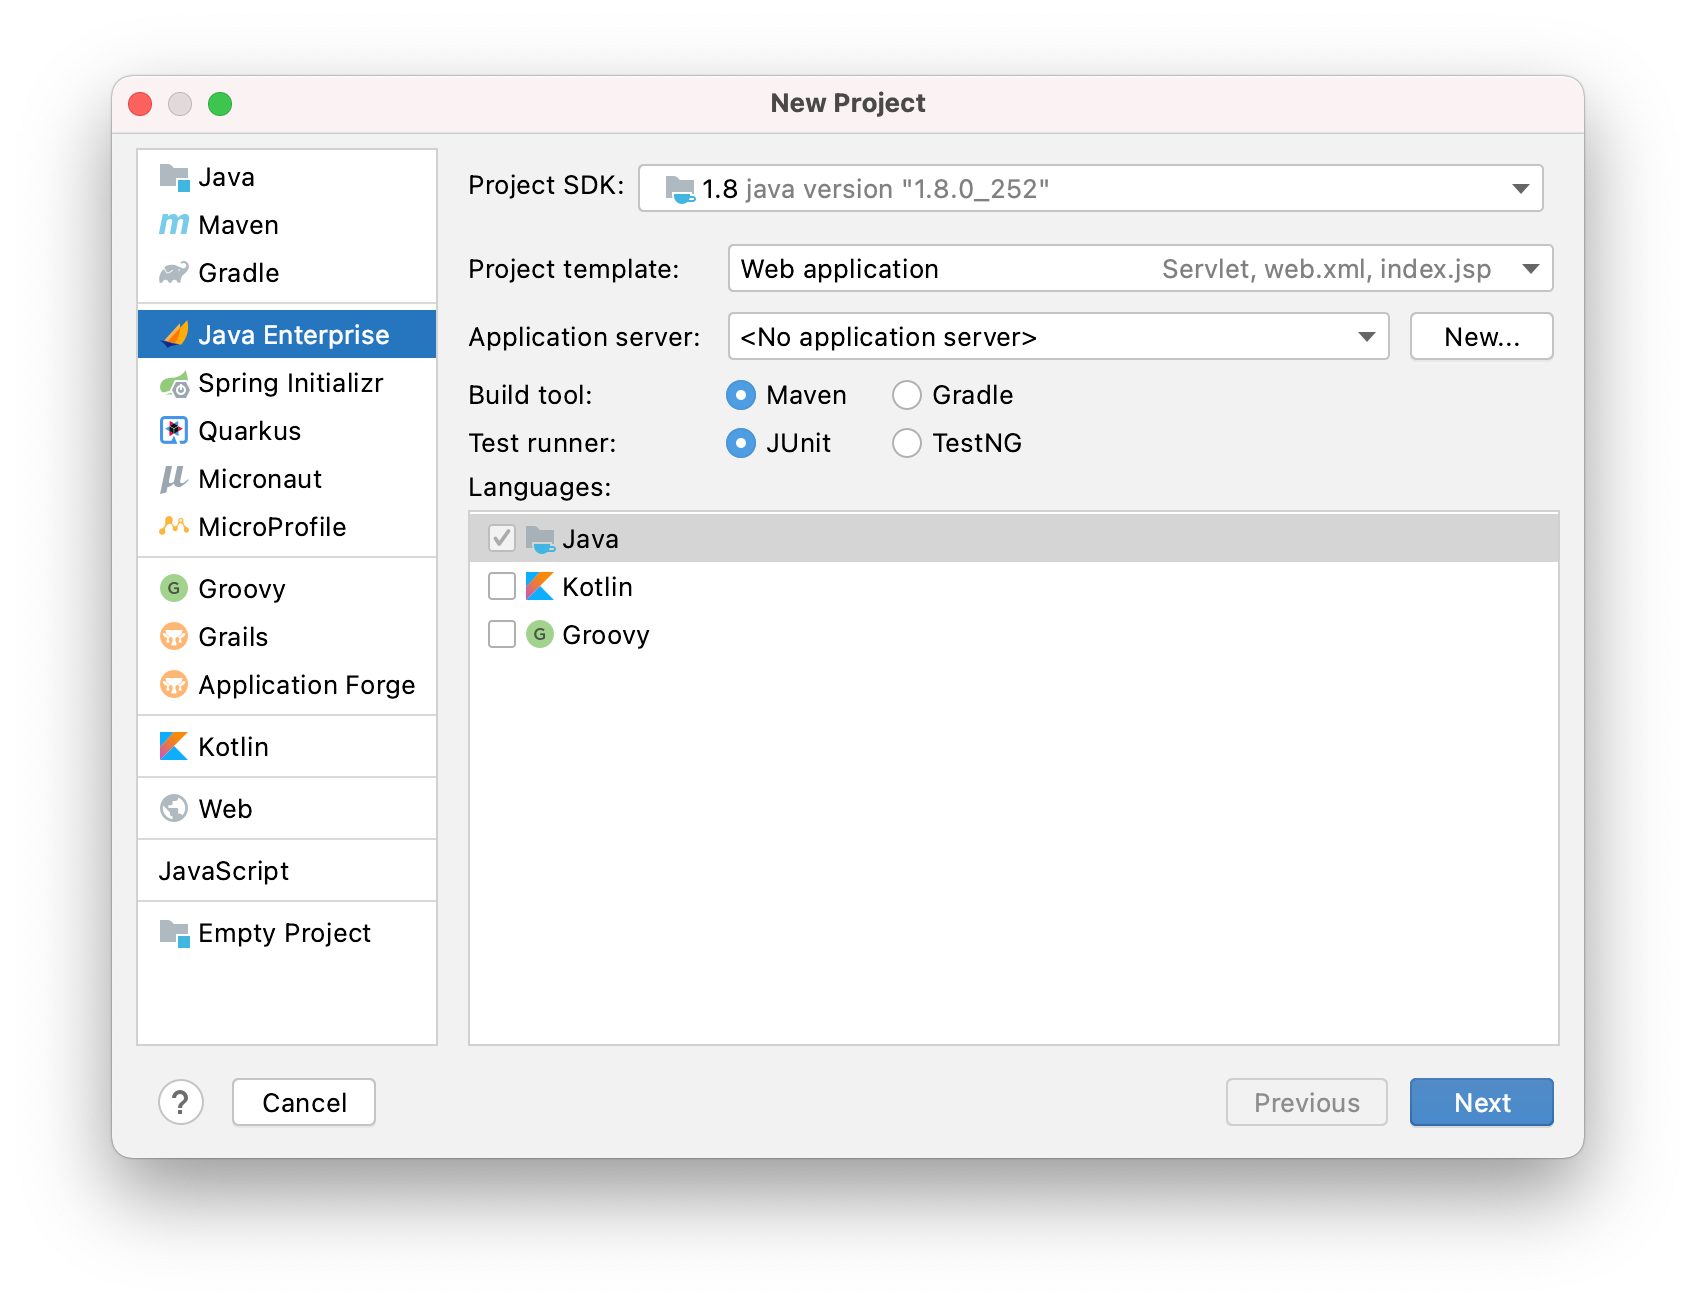
In the New Project dialog, select Java Enterprise. For this tutorial, use Java 1.8 as the project SDKs and leave other settings by default: Maven as the build tool and JUnit as the test runner. Select Java as your project language and click Next.

-
In the Libraries and Frameworks list, select the Web Profile specification and click Next.
-
Enter a name for your project:
SimpleJavaWebApp. Then click Finish. -
Wait for IntelliJ IDEA to create and index the project.
-
In the Project tool window, right-click the src/main/webapp directory, point to New and click JSP/JSPX.
-
In the Create JSP/JSPX page dialog, enter the name
indexand click OK. -
Open the src/main/webapp/index.jsp file and paste the following HTML code as the entrypoint for the servlet:
<%@ page contentType="text/html;charset=UTF-8" language="java" %> <html> <head> <title>Simple Java Web App Demo</title> </head> <body> <h1>Hello, I am a Java web app!</h1> <p>I am running from a WAR artifact.</p> </body> </html> -
Right-click the top level node in the Project tool window and select New | Directory.
-
In the New Directory dialog, enter the directory name docker-dir and press Enter.
This directory will be used for the Dockerfile and WAR artifact.
Build a WAR artifact
-
Open project settings Ctrl+Alt+Shift+S and click Artifacts.
-
Select the
SimpleJavaWebApp:warartifact and set the Output directory to point to the docker-dir directory. Click OK to apply the changes. -
From the main menu, select .
-
In the Build Artifact dialog, select to build the SimpleJavaWebApp:war artifact.
You should see the built artifact in the specified output directory docker-dir/SimpleJavaWebApp-1.0-SNAPSHOT.war.
Run a Wildfly server container from a Dockerfile
-
In the Project tool window, right-click the docker-dir directory and select New | File.
-
In the New File dialog, enter the name of the file Dockerfile and press Enter.
-
Paste the following code into the Dockerfile:
FROM jboss/wildfly COPY SimpleJavaWebApp-1.0-SNAPSHOT.war /opt/jboss/wildfly/standalone/deployments/This will set the base image of the container to jboss/wildfly and copy the WAR artifact to the Wildfly server default deployment directory.
-
Click the green arrows in the gutter next to the
FROMcommand and then click Run on Docker.
This will start a run configuration with the default settings. The application will be deployed inside the Wildfly server running in a container, but you will not be able to access it from the host, because port 8080 in the container is not published to the host.
-
Click the green arrows in the gutter next to the
FROMcommand and then click Edit 'docker-dir/Dockerfile'.
-
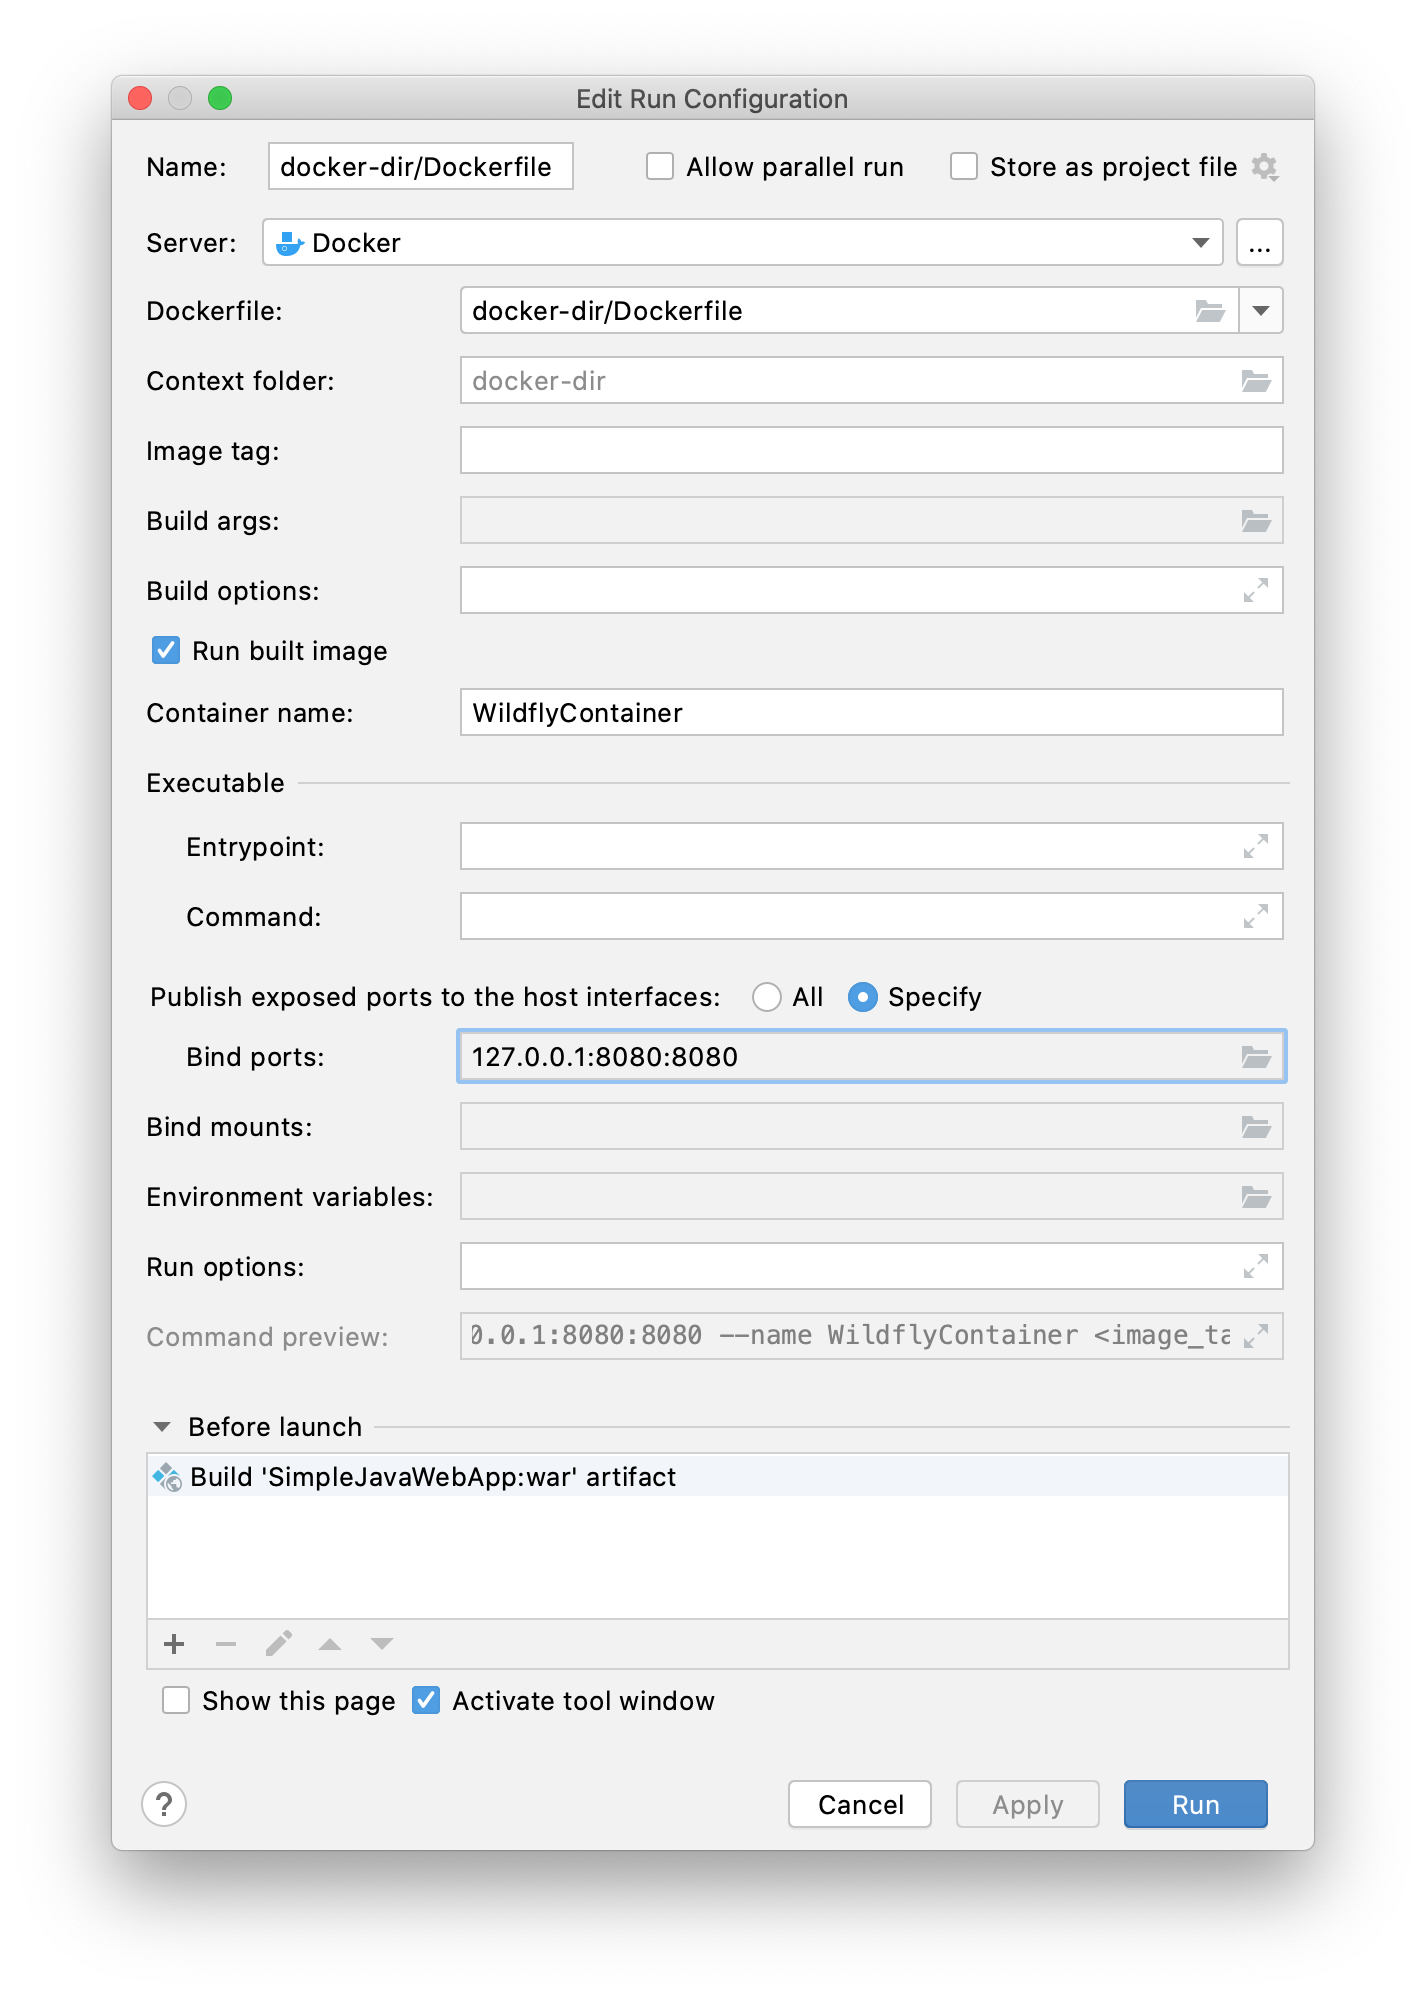
In the Edit Run Configuration dialog, you can optionally specify the name of the container for convenience (otherwise, Docker uses a default randomized name).
Set the following port bindings:
-
Host port: 8080
-
Container port: 8080
-
Protocol: tcp
-
Host IP: 127.0.0.1
Add a task in the Before launch section to build the SimpleJavaWebApp:war artifact every time you start this run configuration.

-
-
Click Run to recreate the container with the new settings.
-
When the container starts, open the following address in your web browser: http://127.0.0.1:8080/SimpleJavaWebApp-1.0-SNAPSHOT/.
You should see the following page:

You should be able to see the running container and the pulled jboss/wildfly image in the Services tool window ( or Alt+8) under Docker.
